3D ontwerp SCAD – Compact Planetary Gearbox
![]()
Screens:


Thingiverse commentaar:
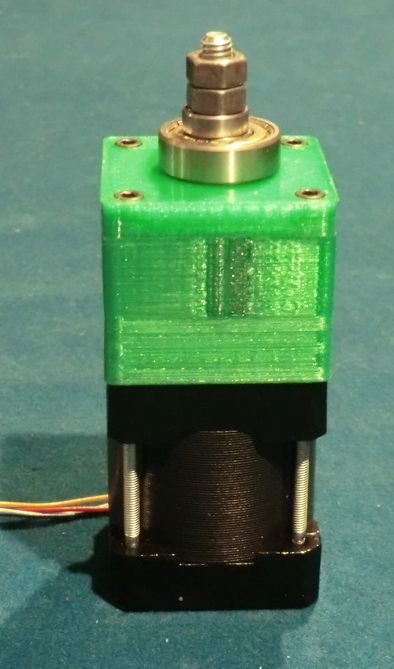
A 40mm x 40mm x 34mm Planetary gearbox designed to be mounted to a Nema 17 motor. It’s gear ratio is 4.444:1 (40:9 for those who dislike decimals).
Version 2
Now supports an M8 bolt for the output by default.
Changing the output size no longer requires reprinting the entire assembly – just print the top half of the planet frame, and the cover.
If you want the M6 version, print m6_output.stl as well.
If you’ve already printed the M6 version, and want to convert it to M8, print m8_output.stl.
Warning! This is difficult to print. Unlike Jag’s design it doesn’t have a lot of overhangs, but the gear teeth require a lot of precision.
Instructions:
Print it, assemble it, disassemble it, grind away at all of the strings and blobs that are making it jam, repeat until happy, then disassemble it one last time and grease it.
One of the 608 bearings goes on the inside of the case. The other should be holding the end of the bolt in place, with a locknut, or a pair of nuts.
I spent quite a lot of time just slicing it and looking at slic3r’s output before committing it to plastic, and still printed it 4 times before I was happy with how it printed. Expect to have to print the gears slowly – I printed mine at 20mm/min, with a .35mm nozzle and .25mm layer height.
The .scad is fairly parametric, so you can adjust the number of annulus and planet teeth to produce different (and probably unprintable) gear ratios.
This is marked as a work in progress, because I intend to use it to drive an extruder, and still need to design the extruder body.
Assemble (comment):
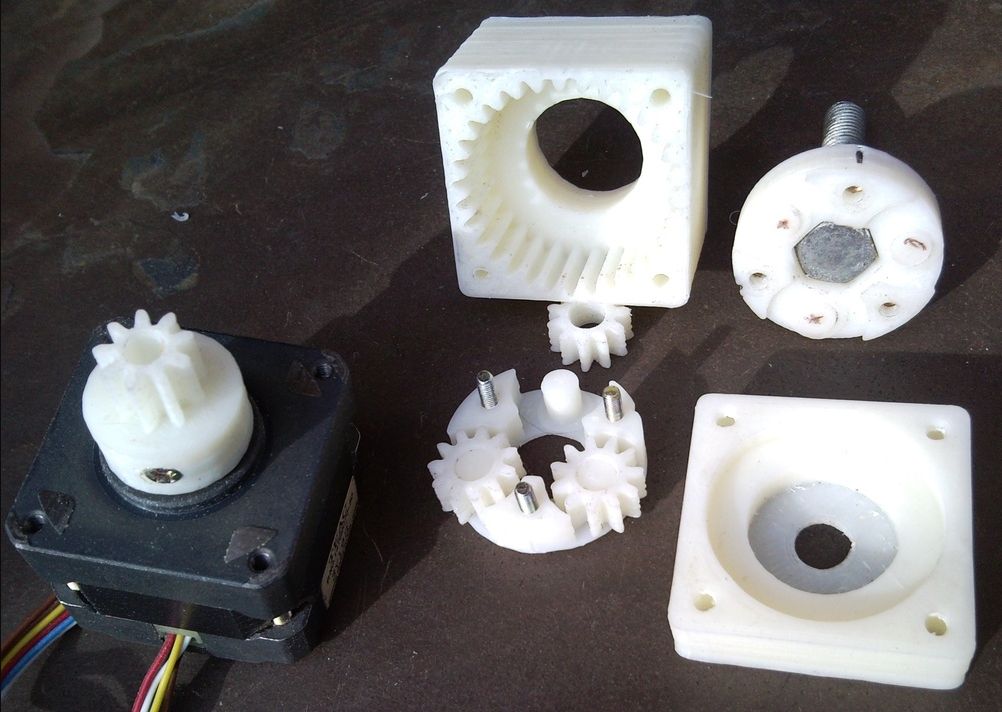
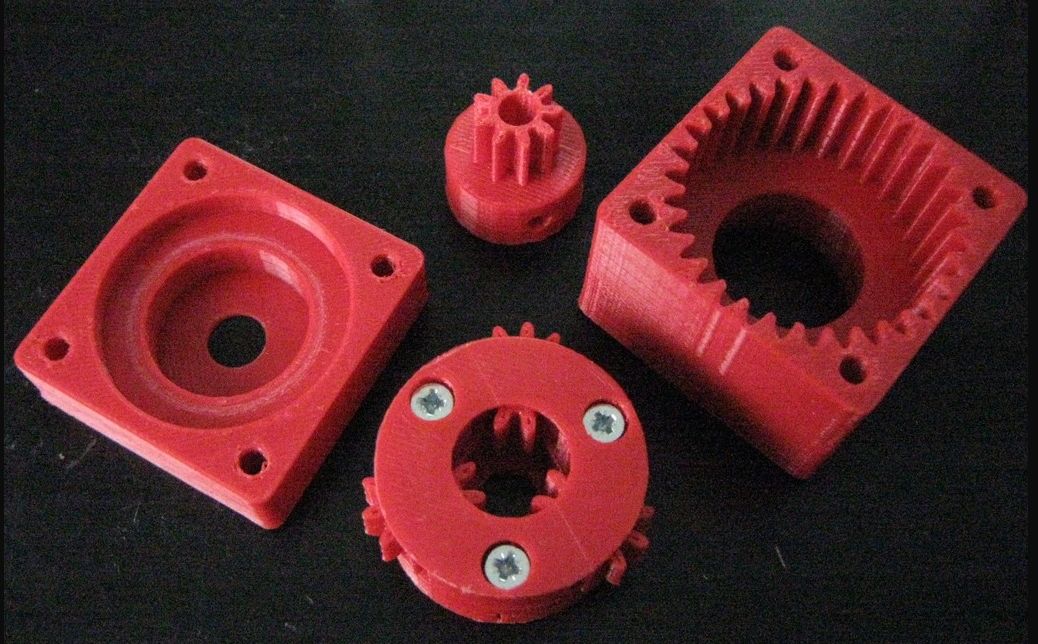
Install the output bolt into the top of the planet frame. install the planets into the bottom of planet frame. Attach the bottom of the planet frame to the top frame using M3x12 screws and nuts.
Install the bearing into the cover. Run the output bolt through the cover. Insert the planet frame into the annulus (ring) gear, aligning the teeth of the gears.
Attach the sun gear to the motor.
Attach the gearbox to the motor using M3x35 screws, making sure that the teeth on the sun gear are
aligned to the planets, and that the sun gear has adequate clearance.
BOM:
3 M3x12 Socket Head Cap Screw
4 M3 Nut
1 M3x6 Set Screw
4 M3x35 Socket Head Cap Screw
1 M8 Hex Head Cap Screw or 1 M6 Hex Head Cap Screw
2 608ZZ (8x22x7) or 126ZZ (6x12x4) Ball bearing.
1 M8 or M6 Nylok Nut
Wat heb je nodig?