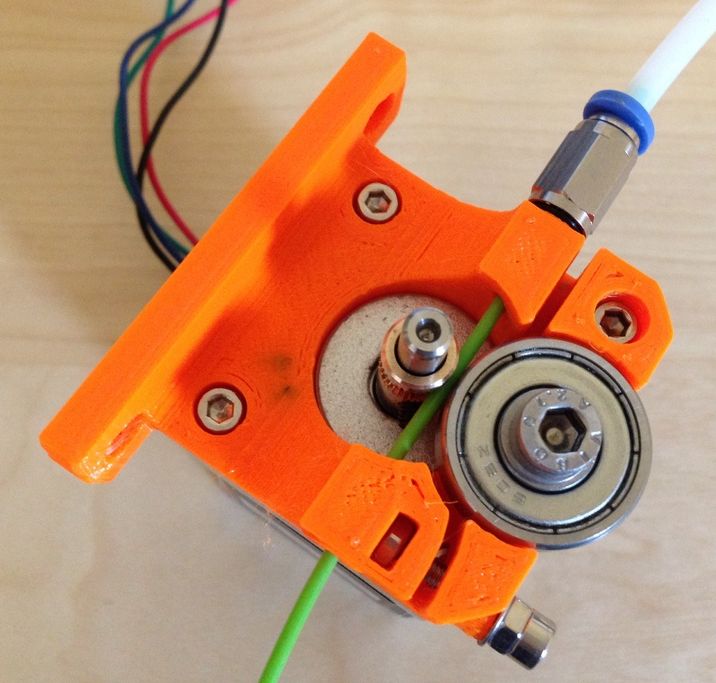
3D Printer – Extruder – Compact Bowden Extruder, direct drive 1.75mm (MK8)
![]()
Gaat veelal samen met X carriage mount E3D v6 bowden extruder
Thingiverse commentaar:
A compact direct drive bowden extruder for 1.75mm and a MK8 style hobbed pulley. The OpenScad is almost completely parametrizable, so it can be adjusted to fit other hobbed pulleys as well. The mounting plate can be removed from OpenScad easily.
I have used a 13x8mm, 5mm bore brass hobbed pulley, because it was easy to acquire here in Germany.
Note: I ordered a suitable compression spring later, so it’s not visible on all of the images.
UPDATE 2015-10-13: Designed alternative idler to solve breaking of bearing support
UPDATE 2015-03-17: Updated idler for better MK7 drive gear support
UPDATE 2014-11-13: Added push-fit bowden inlet option
UPDATE 2014-09-22: Fixed OpenScad file due to non-manifold vertexes between base and filament tunnel after inspection with MeshLab, exported STL
UPDATE 2014-06-01: Removed the work-in-progress flag after extensive testing and positive feedback from the community.
UPDATE 2014-04-27: Placed base and idler “printer ready” beneath each other, added compact_direct_drive_extruder.stl with base and idler combined
UPDATE 2014-04-07: Replaced tensioner hole with slot on idler, added funnel on bowden side of base for easier filament insertion
Instructions:
- Important: If you’re not using the same 13x8mm drive gear as I do, adjust the drive gear dimensions in the OpenSCAD file and export idler and base as separate STL files.
- Choose suitable version: normal inlet or push-fit bowden inlet
- Slice model and print base plate and idler separately. I used Slic3r with 0.2mm layer thickness and a 0.5mm J-Head nozzle.
- Use 2mm drill to clean filament path on base plate.
- Use M5 screw tap to cut thread for push-fit bowden connector on base plate and bearing holder on idler.
- Attach push-fit bowden connector(s) on base plate.
- Attach 608zz bearing to idler and secure it with a M5 washer and a M5x10mm allen head screw. If you are using the alternative idler insert the 608 bearing between idler parts and secure it with a M5x14mm allen head screw.
- Attach NEMA17-Motor with three M3x8mm allen head screws (use countersunk holes).
- Attach idler to base plate with a M3x16mm allen head screw. Avoid to much tension to allow idler moving freely.
- Fasten hobbed pulley on NEMA17 stepper motor shaft. Adjust its height accordingly.
- Insert Filament into extruder.
- Insert M3 nut into base plate slot.
- Use M3 allen head screw of suitable length with washers and a spring to apply pressure on filament.
- Happy extruding ;-)
Parts used (BOM):
- 1x base plate (printed)
- 1x idler (printed)
- 1x hobbed pulley 13x8mm, 5mm bore or similar
- 1x M5 push-fit bowden connector (5mm thread) for 4mm OD bowden tubes (add another one for bowden inlet version)
- 1x 608zz bearing
- 1x M5 washer
- 1x M5x10mm allen head screw (M5x14mm for altenative idler)
- 3x M3x8mm allen head screws
- 1x M3x16mm allen head screw (M3x20mm for alternative idler)
- 1x M3 nut
- 2x M3 washers
- 1x compression spring 3mm ID
- 1x M3 allen head screw with suitable length for the selected spring
Tools used:
- M5 manual screw tap
- 2mm drill