Arduino – FM Radio
Dit project is een FM radio te bedienen met 4 drukknoppen (frequentie en volume), en gebruikt een FM Tuner board, informatie wordt weergegeven via het Nokia schermpje.
Wat heb je nodig?
1) Arduino NANO board
2) Breadboard 830 gaats
3) Si4703 FM module
4) Nokia 5110 scherm
5) 4 drukknopjes
6) wat jumpwires
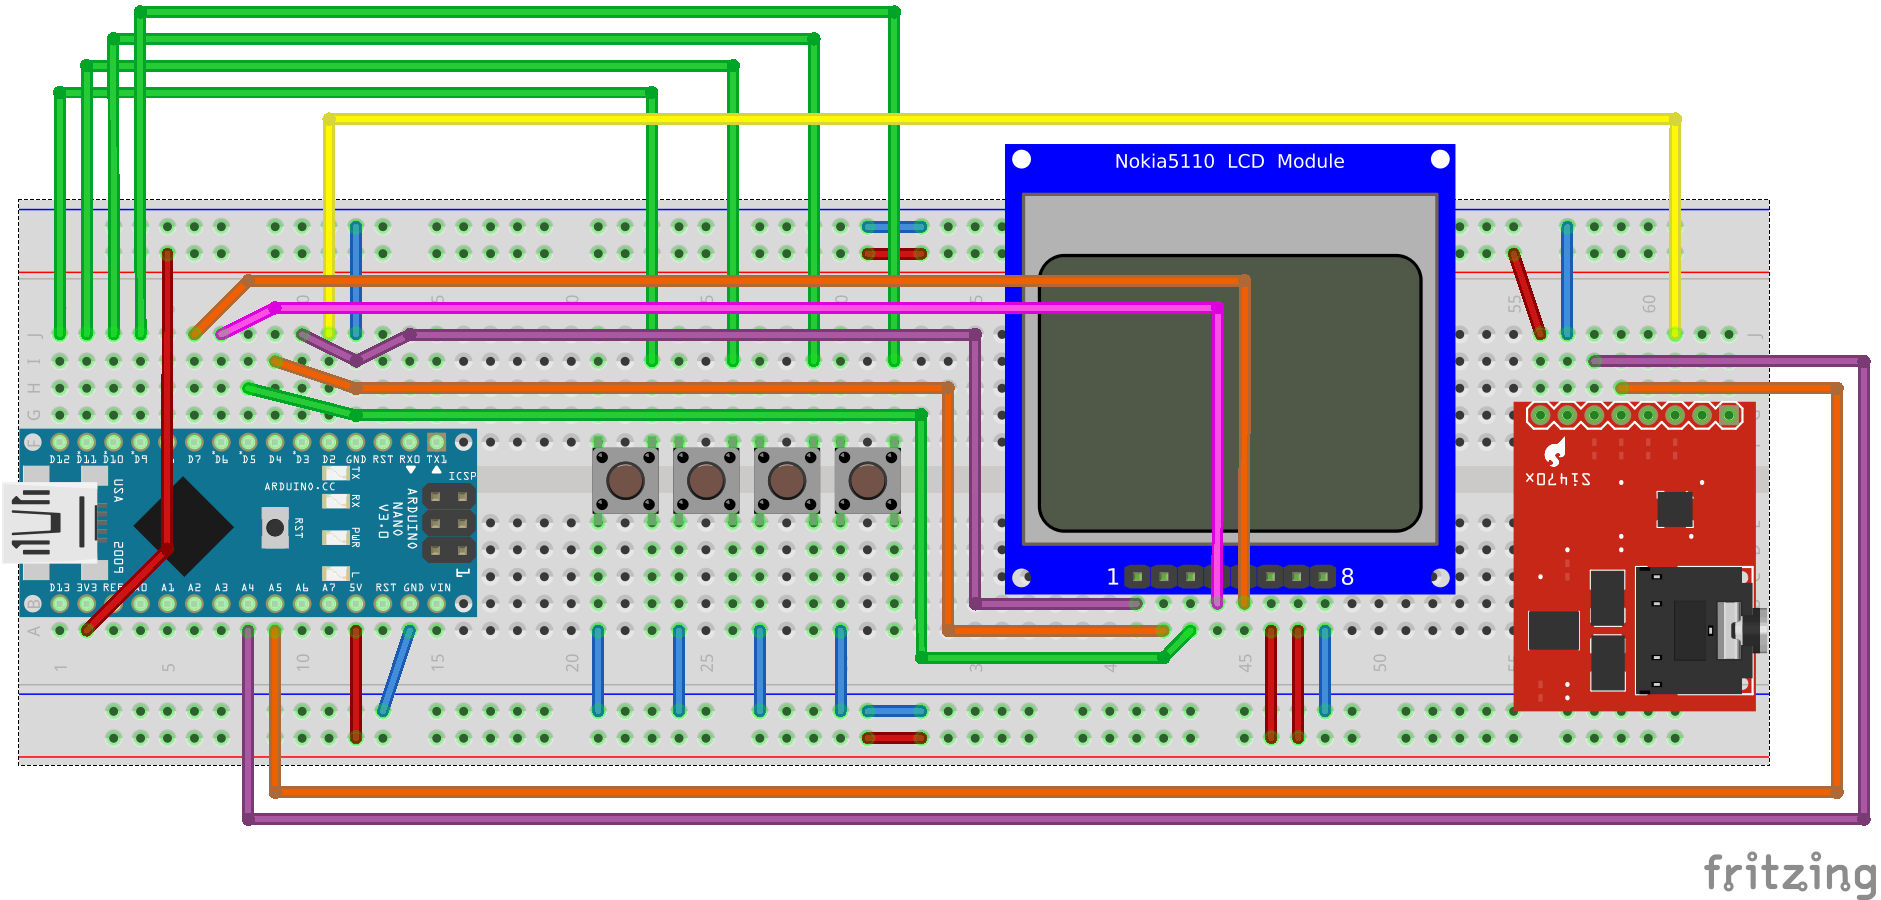
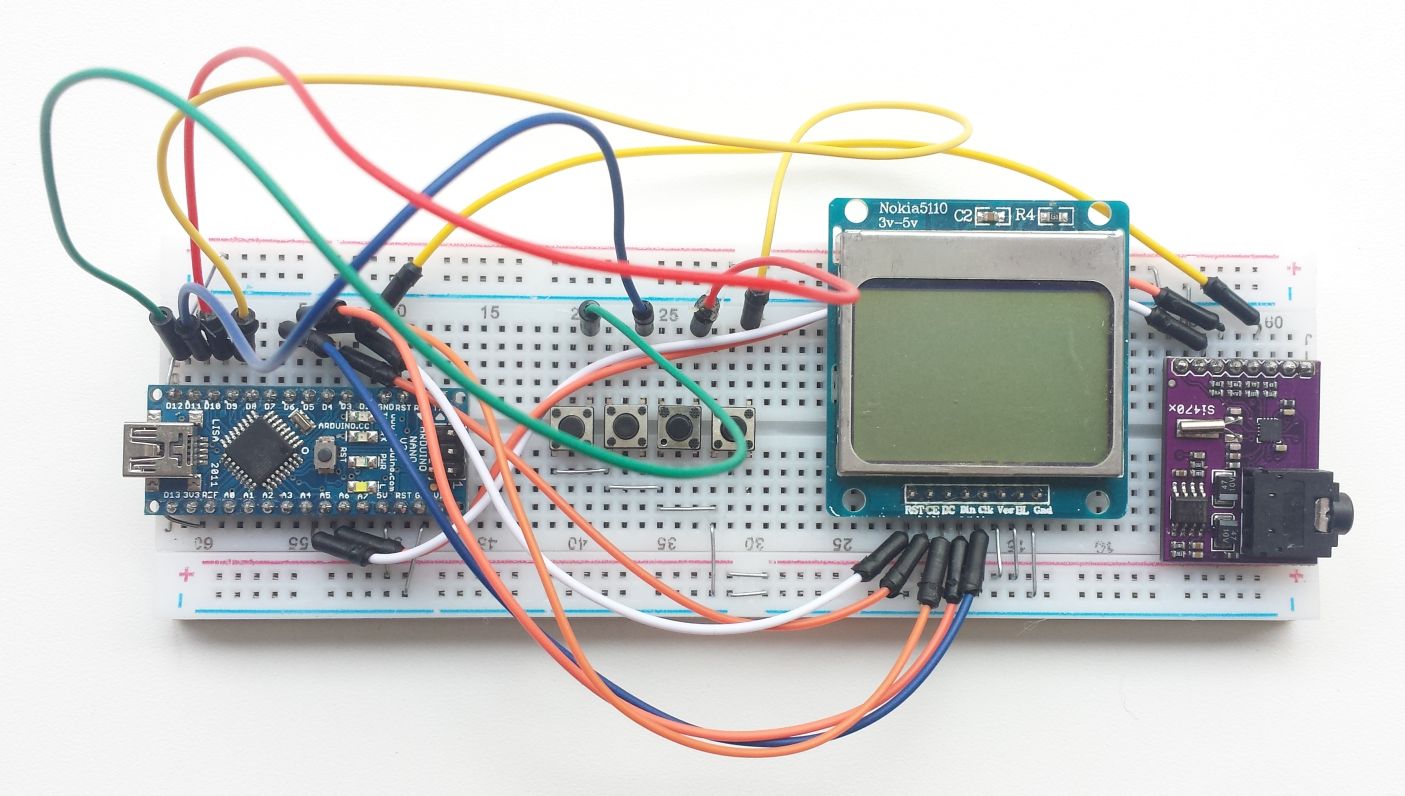
Het aansluitschema:
De code
Benodigde button bibliotheek (via bibliotheek beheer):

|
1 2 3 4 5 6 7 8 9 10 11 12 13 14 15 16 17 18 19 20 21 22 23 24 25 26 27 28 29 30 31 32 33 34 35 36 37 38 39 40 41 42 43 44 45 46 47 48 49 50 51 52 53 54 55 56 57 58 59 60 61 62 63 64 65 66 67 68 69 70 71 72 73 74 75 76 77 78 79 80 81 82 83 84 85 86 87 88 89 90 91 92 93 94 95 |
//Libraries: #include <Adafruit_GFX.h> #include <Adafruit_PCD8544.h> #include <Si4703_Breakout.h> #include <Wire.h> #include <Button.h> Adafruit_PCD8544 display = Adafruit_PCD8544(7, 6, 5, 4, 3); //(SCLK, DIN, DC, CS, RST) Si4703_Breakout radio(2, A4, A5); // (resetPin, SDIO, SCLK) Button KnopVolOmlaag(9); Button KnopVolOmhoog(10); Button KnopFreqOmhoog(11); Button KnopFreqOmlaag(12); //Variables: int volume = 5; // Zet volume op 5. int frequentie = 962; // Zet frequentie op 92.6 Mhz void setup () { Wire.begin(); radio.powerOn(); radio.setVolume(volume); radio.setChannel(frequentie); display.begin(); display.setContrast(60); display.clearDisplay(); } void loop () { // Laat freqentie zien! String frequentiestr = String(frequentie); display.setTextSize(2); display.setTextColor(BLACK); display.setCursor(0,0); display.print(frequentiestr.substring(0,2)); display.print("."); display.print(frequentiestr.substring(2,3)); display.print("0"); display.setCursor(47,15); display.print("MHz"); // Laat freqentie band zien! display.setCursor(0,20); display.setTextSize(1); display.print("FM"); // Laat volume zien. display.setCursor(0,35); display.setTextSize(1); display.setTextColor(WHITE, BLACK); display.print(volume); display.print("/15 "); display.display(); delay(500); display.clearDisplay(); // Teken een driehoek. display.drawLine(80, 30, 80, 45, BLACK); display.drawLine(80, 45, 50, 45, BLACK); display.drawLine(50, 45, 80, 30, BLACK); // Tekenlijnen in het driehoek. for (int x = 0; x < volume; x++) { display.drawLine(50+2*x, 45, 50+2*x, 45-x, BLACK); } // Lees knop uit en neem actie. if (KnopFreqOmhoog.read() == Button::PRESSED) { frequentie = radio.seekUp(); delay(700); } // Lees knop uit en neem actie. if (KnopFreqOmlaag.read() == Button::PRESSED) { frequentie = radio.seekDown(); delay(700); } // Lees knop uit en neem actie. if (KnopVolOmhoog.read() == Button::PRESSED) { volume ++; if (volume == 16) volume = 15; radio.setVolume(volume); delay(700); } // Lees knop uit en neem actie. if (KnopVolOmlaag.read() == Button::PRESSED) { volume --; if (volume < 0) volume = 0; radio.setVolume(volume); delay(700); } delay(100); } |
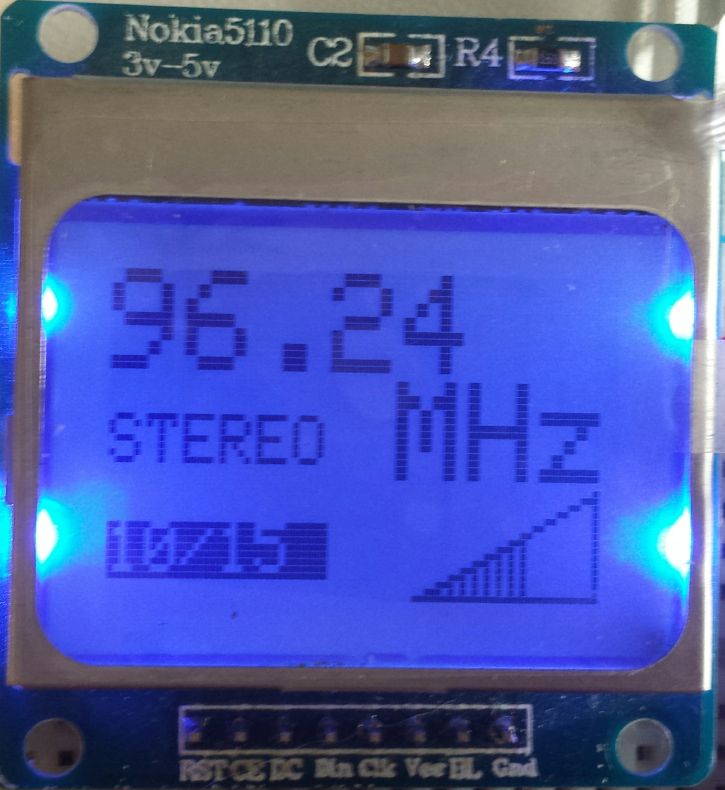
De praktijk:
Bron voor het idee: instructables.com


