Arduino – Geheugen EEPROM 24LCxxx
Hardware:
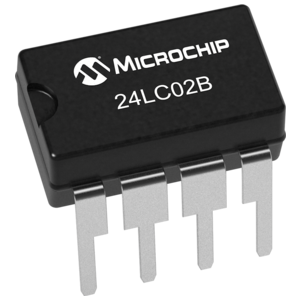
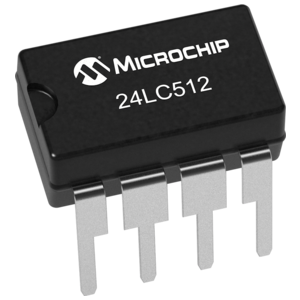
De 24LCxxx chips zijn EEPROM geheugens, eenvoudig aan te spreken met het SPI protocol, om zo waarden in het geheugen op te slaan.
De chip kent verschillende uitvoeringen in geheugengrootte:
| Chip: | Grootte: |
|---|---|
| 24LC00 | 16 bytes |
| 24LC01 | 128 bytes |
| 24LC014 | 128 bytes |
| 24LC02 | 256 bytes |
| 24LC024 | 256 bytes |
| 24LC025 | 256 bytes |
| 24LC04 | 512 bytes |
| 24LC08 | 1 kByte |
| 24LC16 | 2 kBytes |
| 24LC32 | 4 kBytes |
| 24LC64 | 8 kBytes |
| 24LC128 | 16 kBytes |
| 24LC256 | 32 kBytes |
| 24LC512 | 64 kBytes |
| 24LC1025 | 128 kBytes |
| 24LC1026 | 128 kBytes |
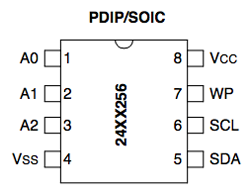
Pinout
 | |
|---|---|
| Pin: | Functie: |
| 1 | A0 (SPI adres instelling) |
| 2 | A1 (SPI adres instelling) |
| 3 | A2 (SPI adres instelling) |
| 4 | Vss (GND) |
| 5 | SDA (Serial Data) |
| 6 | SCL (Serial Clock) |
| 7 | WP (WriteProtect) |
| 8 | Vcc (+3-5v) |
Aansluiten op de Arduino
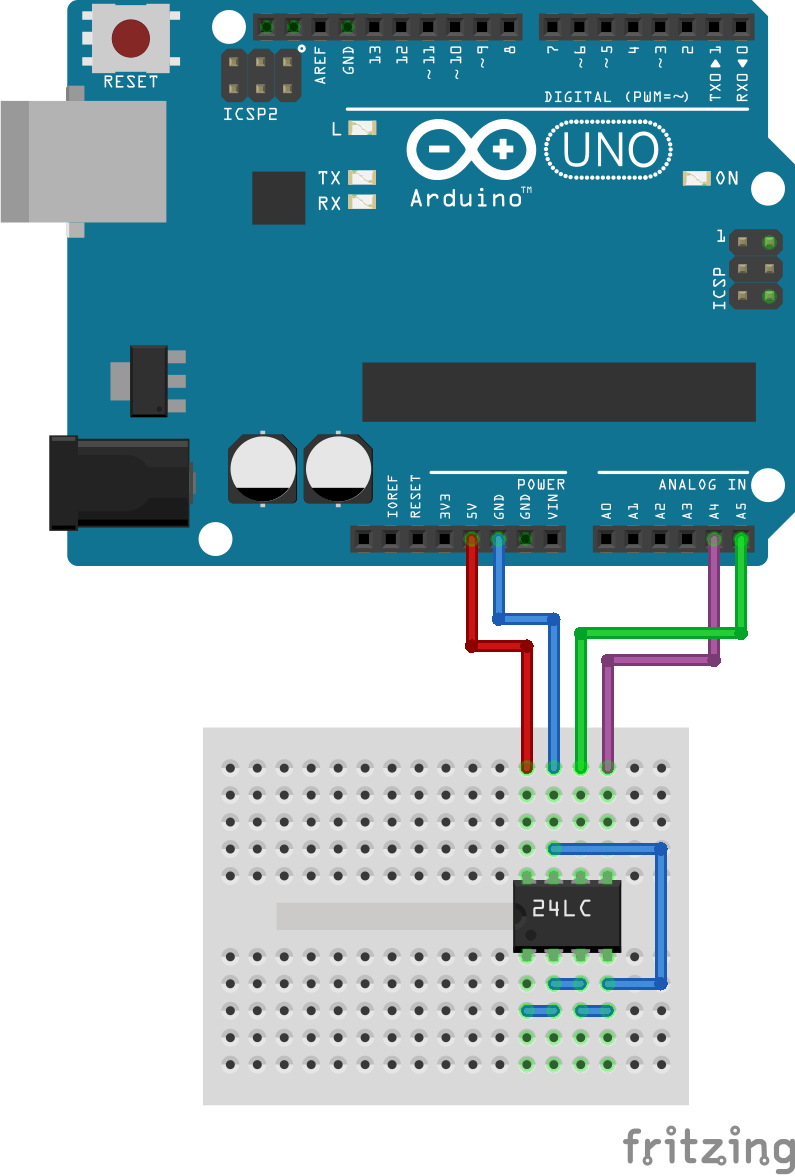
Sluit het volgende aan via onderstaand schema:
| 24LCxxx pin: | Arduino pin: |
|---|---|
| 1 / A0 (SPI adres instelling) | GND |
| 2 / A1 (SPI adres instelling) | GND |
| 3 / A2 (SPI adres instelling) | GND |
| 4 / Vss (GND) | GND |
| 5 / SDA (Serial Data) | A4 |
| 6 / SCL (Serial Clock) | A5 |
| 7 / WP (WriteProtect) | GND |
| 8 / Vcc (+3-5v) | +5v |
WP hoog (+5v) = beveiligd tegen schrijven, laag = schrijven toegestaan.
Ps. het is optioneel om A0, A1 en A2 met GND te verbinden, maar het voorkomt zo “floating” waarden.
Script #1 – Schrijven en lezen
Met dit script kan je een byte schrijven en lezen vanaf de EEPROM.
|
1 2 3 4 5 6 7 8 9 10 11 12 13 14 15 16 17 18 19 20 21 22 23 24 25 26 27 28 29 30 31 32 33 34 35 36 37 38 39 40 41 42 43 44 45 46 47 48 49 50 51 52 53 54 55 56 57 58 59 60 61 62 63 64 |
#include <Wire.h> #define disk1 0x50 // Stel I2C adres in van de chip. // Variabelen declareren. unsigned int waarde = 0; unsigned int adres = 0; void setup(void) { Serial.begin(9600); // Start seriele interface. Wire.begin(); // Start I2C interface. writeEEPROM(disk1, 0, 100); // Waarde "100" schrijven naar disk1 op positie 0. waarde = readEEPROM(disk1, 0); // Waarde uitlezen van disk1 op positie 0. Serial.println(waarde); // Waarde printen. } void loop() { delay(50); } // Functie om een byte te schrijven naar de EEPROM. void writeEEPROM(int deviceaddress, unsigned int eeaddress, byte data) { if (adres <= 255) { Wire.beginTransmission(deviceaddress); Wire.write((int)(eeaddress)); Wire.write(data); Wire.endTransmission(); } if(adres >= 511) { Wire.beginTransmission(deviceaddress); Wire.write((int)(eeaddress >> 8)); // MSB (Most Significant Bit). Wire.write((int)(eeaddress & 0xFF)); // LSB (Less Significant Bit). Wire.write(data); Wire.endTransmission(); } delay(5); } // Functie om een byte uit de EEPROM te lezen. byte readEEPROM(int deviceaddress, unsigned int eeaddress) { byte rdata = 0xFF; if(adres <= 255) { Wire.beginTransmission(deviceaddress); Wire.write((int)(eeaddress)); Wire.endTransmission(); } if(adres >= 511) { Wire.beginTransmission(deviceaddress); Wire.write((int)(eeaddress >> 8)); // MSB (Most Significant Bit). Wire.write((int)(eeaddress & 0xFF)); // LSB (Less Significant Bit). Wire.endTransmission(); } Wire.requestFrom(deviceaddress,1); if (Wire.available()) rdata = Wire.read(); return rdata; } |
Script #2 – String schijven
Met onderstaand script kun je regel tekst schrijven en lezen vanuit de EEPROM.
|
1 2 3 4 5 6 7 8 9 10 11 12 13 14 15 16 17 18 19 20 21 22 23 24 25 26 27 28 29 30 31 32 33 34 35 36 37 38 39 40 41 42 43 44 45 46 47 48 49 50 51 52 53 54 55 56 57 58 59 60 61 62 63 64 65 66 67 68 69 70 71 72 |
#include <Wire.h> #define disk1 0x50 // Stel I2C adres in van de chip. // Variabelen declareren. unsigned int waarde = 0; unsigned int adres = 0; char tekst[] = "Hallo Wereld."; //String void setup(void) { Serial.begin(9600); // Start seriele interface. Wire.begin(); // Start I2C interface. Wire.setClock(400000L); // zet de snelheid van de bus op 400Khz Serial.println("Data wegschrijven..."); for (int i=0; i < sizeof(tekst); i++) { writeEEPROM(disk1, i, tekst[i]); // Waarde schrijven naar disk1 op positie [i]. } Serial.println("Data inlezen..."); Serial.print("DATA: "); for (int i=0; i < sizeof(tekst); i++) { waarde = readEEPROM(disk1, i); // Waarde uitlezen van disk1 op positie [i]. Serial.print((char)waarde); // Waarde printen. } } void loop() { delay(50); } // Functie om een byte te schrijven naar de EEPROM. void writeEEPROM(int deviceaddress, unsigned int eeaddress, byte data) { if (adres <= 255) { Wire.beginTransmission(deviceaddress); Wire.write((int)(eeaddress)); Wire.write(data); Wire.endTransmission(); } if(adres >= 511) { Wire.beginTransmission(deviceaddress); Wire.write((int)(eeaddress >> 8)); // MSB (Most Significant Bit). Wire.write((int)(eeaddress & 0xFF)); // LSB (Less Significant Bit). Wire.write(data); Wire.endTransmission(); } delay(5); } // Functie om een byte uit de EEPROM te lezen. byte readEEPROM(int deviceaddress, unsigned int eeaddress) { byte rdata = 0xFF; if(adres <= 255) { Wire.beginTransmission(deviceaddress); Wire.write((int)(eeaddress)); Wire.endTransmission(); } if(adres >= 511) { Wire.beginTransmission(deviceaddress); Wire.write((int)(eeaddress >> 8)); // MSB (Most Significant Bit). Wire.write((int)(eeaddress & 0xFF)); // LSB (Less Significant Bit). Wire.endTransmission(); } Wire.requestFrom(deviceaddress,1); if (Wire.available()) rdata = Wire.read(); return rdata; } |
SPI adressen aanpassen
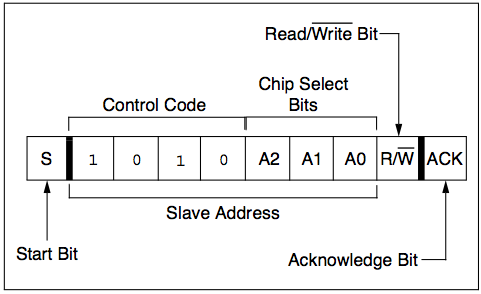
Het SPI adres kan je aanpassen met de pinnen A0, A1 en A2, er kunnen op deze manier 8 chips aangesloten worden op de bus lijn.
De SPI adressering van de 24LCxxx chip is als volgt: 1 0 1 0 A2 A1 A0 x
Als je alle pinnen (A0, A1 en A2) met GND verbind is het I2C adres 1010000 = 0x50 in hexadecimaal.
Als je alle pinnen op VCC aansluit dan heb je 1010111 = 0x57.
| A2 | A1 | A0 | adres |
|---|---|---|---|
| GND | GND | GND | 0x50 |
| GND | GND | + 5V | 0x51 |
| GND | + 5V | GND | 0x52 |
| GND | + 5V | + 5V | 0x53 |
| + 5V | GND | GND | 0x54 |
| + 5V | GND | + 5V | 0x55 |
| + 5V | + 5V | GND | 0x56 |
| + 5V | + 5V | + 5V | 0x57 |
Bronnen:
www.hobbytronics.co.uk
www.instructables.com
labdegaragem.com
rweather.github.io
vascoferraz.com
arduino8.webnode.cz
[#/datasheets/24lcxxx” ]


