Mechanica Firmware – Horus (ZUM Scan)
FIRMWARE
Informatie (ENG):
The Horus firmware is a program that allows you to control the stepper motors, laser modules and LDR analog sensors using G-code commands. It is compatible with Arduino based boards and the ZUM SCAN shield.
The firmware has been designed to control all physical elements of the Ciclop 3D scanner, a rotating scanner based on laser triangulation. The base of the code is the Grbl project, a program that enables CNC machines to be controlled. It has also been used in other projects such as Marlin, the firmware for 3D printers.
This firmware is written in C. ,Derived from Grbl v0.9 by Jesús Arroyo (Mundo Reader S.L.)
Grbl’s lead developer is Simen Svale Skogsrud. Sonney Jeon (Chamnit) improved some parts of grbl.
- Angular stepper motor movement
- Interrupt based movement with real angular acceleration
- Laser modules control
- Analog sensor read
- Configuration interface with $ commands
The default baudrate is 115200.
- G1 – Angular movement
- G50 – Reset all positions to zero
- M0 – Program pause
- M2 – Program end and reset
- M17 – Enable/Power stepper motor
- M18 – Disable stepper motor
- M50 – Read LDR
- M70 – Laser off
- M71 – Laser on
Build
Arduino:
Open horus-fw.ino, select your board and upload.
|
1 2 |
sudo apt-get install gcc-avr avr-libc make |
HEX:
The binary horus-fw.hex can be flashed with Horus GUI.
Connection
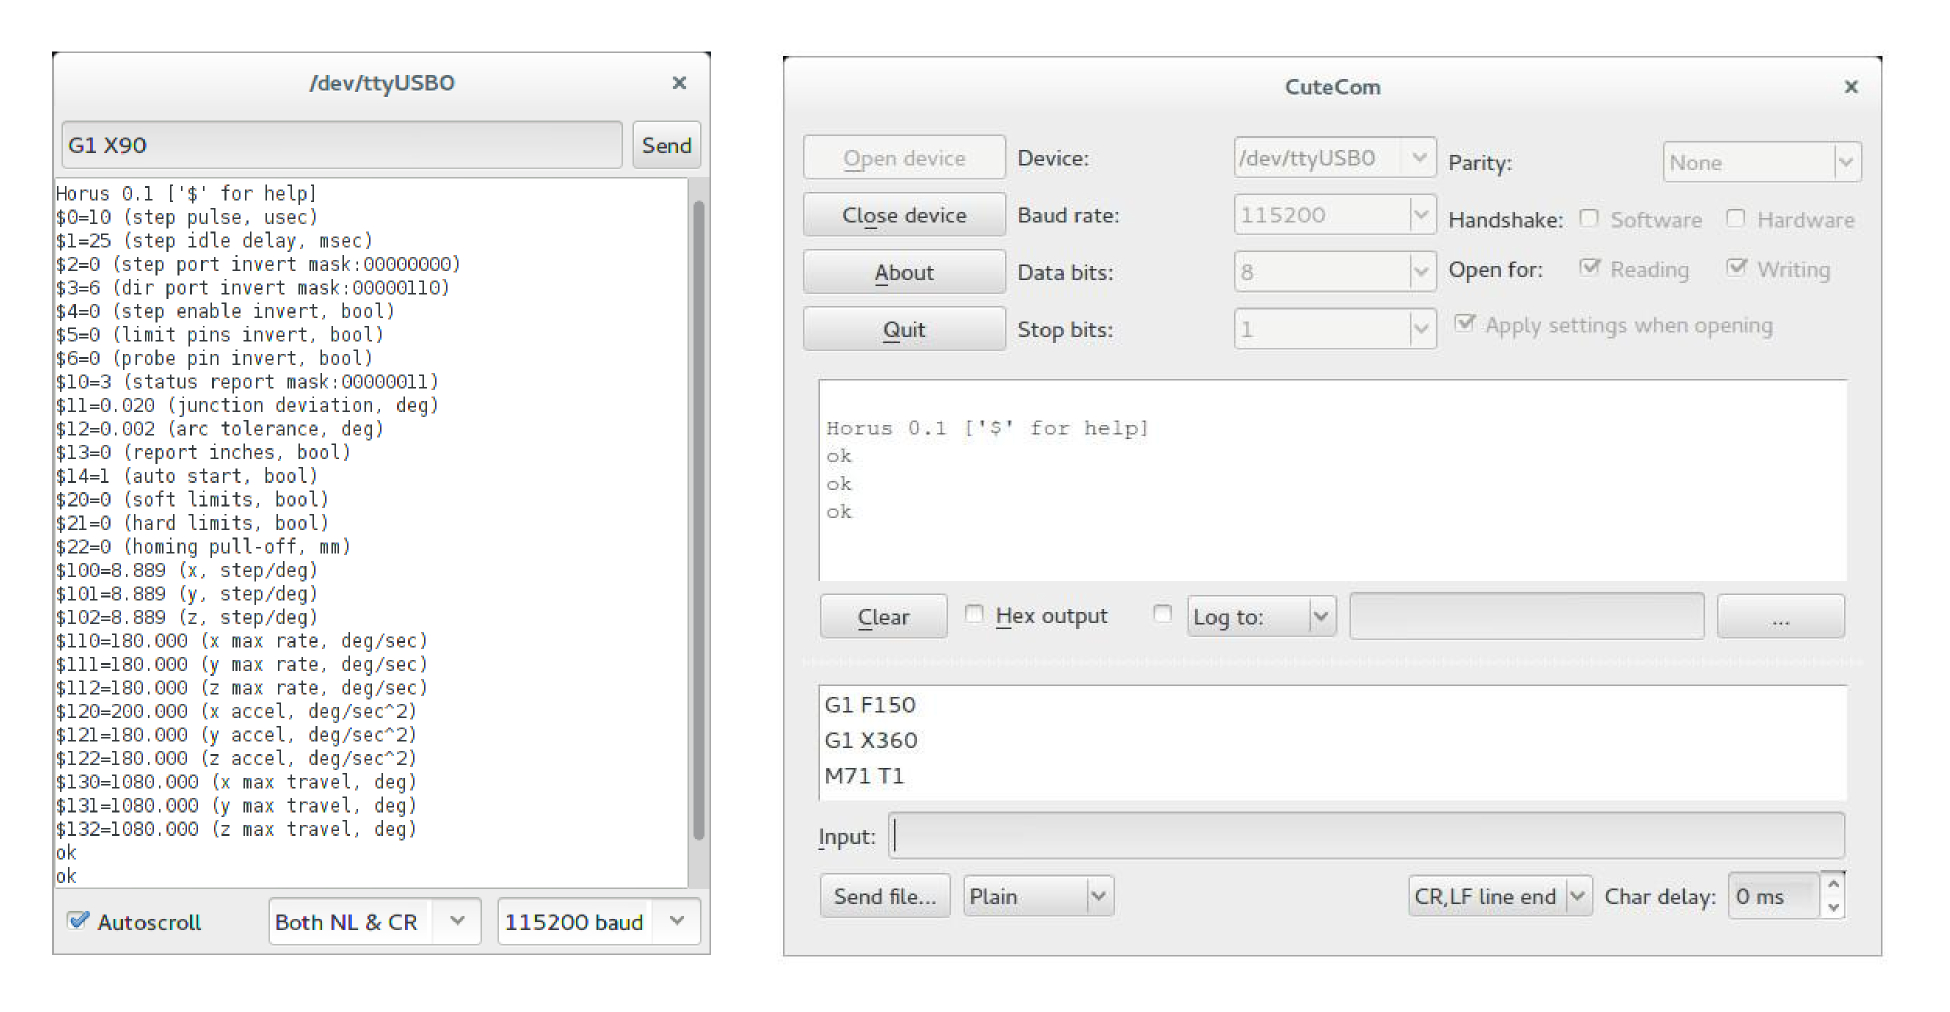
You can communicate with the board via USB or Bluetooth. There are different open source applications for establishing the connection, such as the Arduino Serial Monitor or CuteCom10. If the latter is used, you will need to select the device, adjust the baud rate to 115200 and set the command ending to LF or CR, ‘\n’ or ‘\r\n’, respectively.
After starting the serial communication, this will be the first message that Horus sends:
Horus 0.1 [‘$’ for help]
After each command is received, the software will answer with ok when the processing of that command ends, either correctly or with an error message. The communication flow is as follows:
|
1 2 |
→ G1 X360\r\n ← ok\r\n |
Configfuration
The Horus firmware, due to its Grbl heritage, provides a configuring and monitoring interface which uses $ commands, as well as control commands in real time. All supported commands are described in the Grbl wiki.
Yu can also view the help menu on the available configuration commands by sending $:
|
1 2 3 4 5 6 7 8 9 10 11 12 13 |
$$ (view settings) $# (view # parameters) $G (view parser state) $I (view build info) $N (view startup blocks) $x=value (save setting) $Nx=line (save startup block) $C (check gcode mode) $X (kill alarm lock) ~ (cycle start) ! (feed hold) ? (current status) ctrl-x (reset) |
As an example, the commands $110=v y $120=a, adjust the speed and maximum acceleration of the motors to v º/s and a º/s² respectively.
G-code commands
G-code is the most widely used programming language in numerical control devices (CNC). Milling machines, laser cutters and 3D printers use this de facto standard to communicate. Instructions are executed sequentially in this language. These are the G-code commands that have been integrated into Horus:
G1: Circular movement
G1 Fv Adjusts the rotational speed to v degrees per second
G1 Xd Moves the stepper motor to the position d defined in degrees
M0–M2: Pause and program end
M0 Pauses the program. It may only be restarted through the Cycle start (~) command
M2 Stops the program and resets it
M17–M18: Enable / Disable the stepper motors
M17 Enables the motors, maintaining their position. They stay enabled even after sending G1 commands
M18 Disables the stepper motors. They stay disabled even after sending G1 commands.
M50: LDR analog sensors reading
M50 Tv Reads the LDR sensor connected to pin v. Returns an integer between 0 and 1023
M70–M71: Laser modules turn on / off
M70 Tv Turns off the laser module v
M71 Tv Turns on the laser module v. After a four-minute timeout, the laser is turned off automatically
Download Horus firmware @ Github
[#/mechanica/firmware/Horus_(ZUM_Scan)” ]


