Raspberry Pi – DisplayLink USB screen
![]()
![]()
In the days of 2012-2016 it could be a struggle to get a displayLink scrren working, needed to compile the Linux core again with some “udlfb” libs, well….it seems all integrated out of the box these days!, you just need to adjust some settings.
Hardware
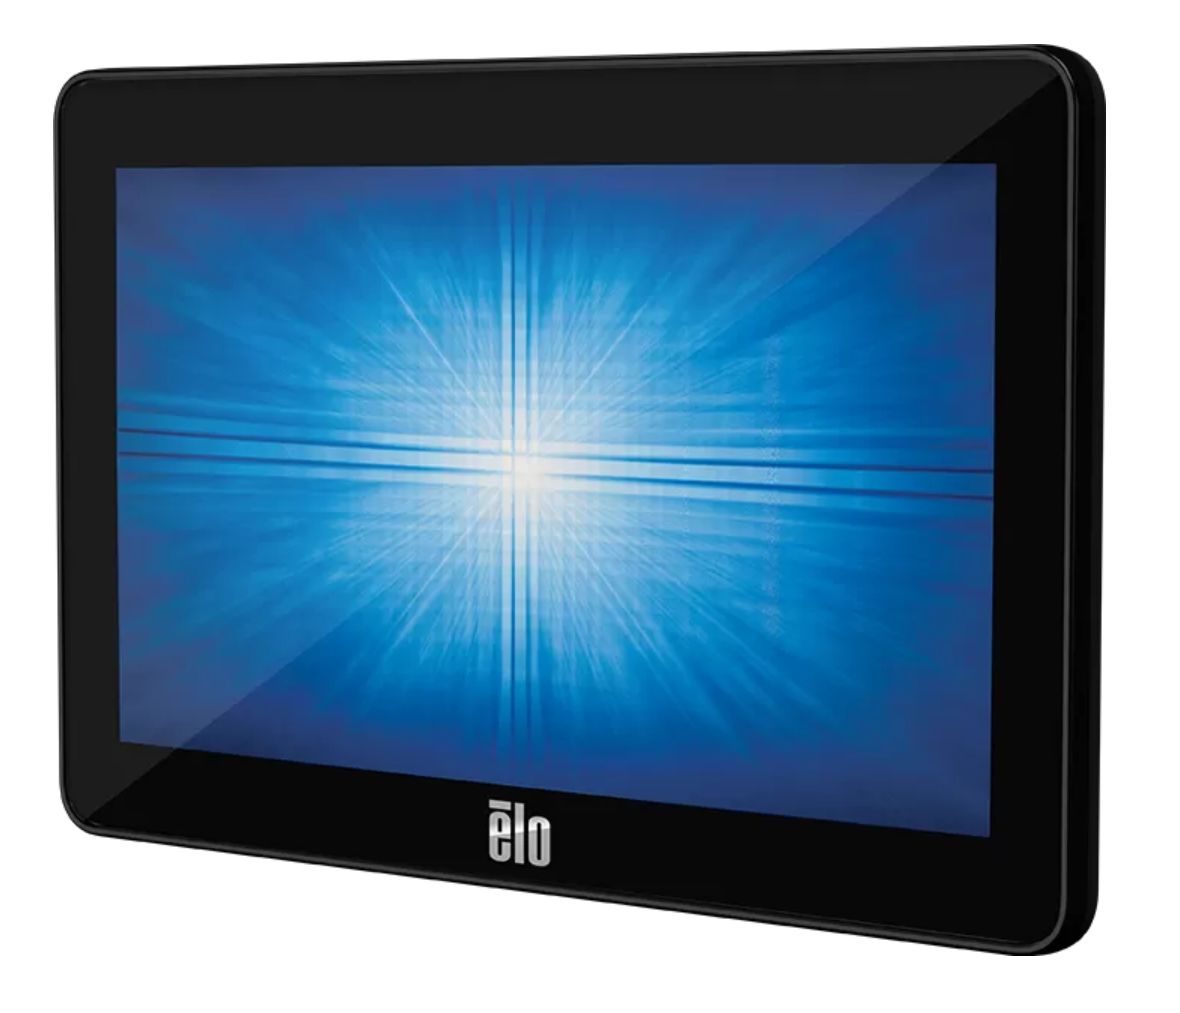
So, for our example we use a ELO 7″ 5V 1A ET0702L screen with a resolution of 800×480 pixels:
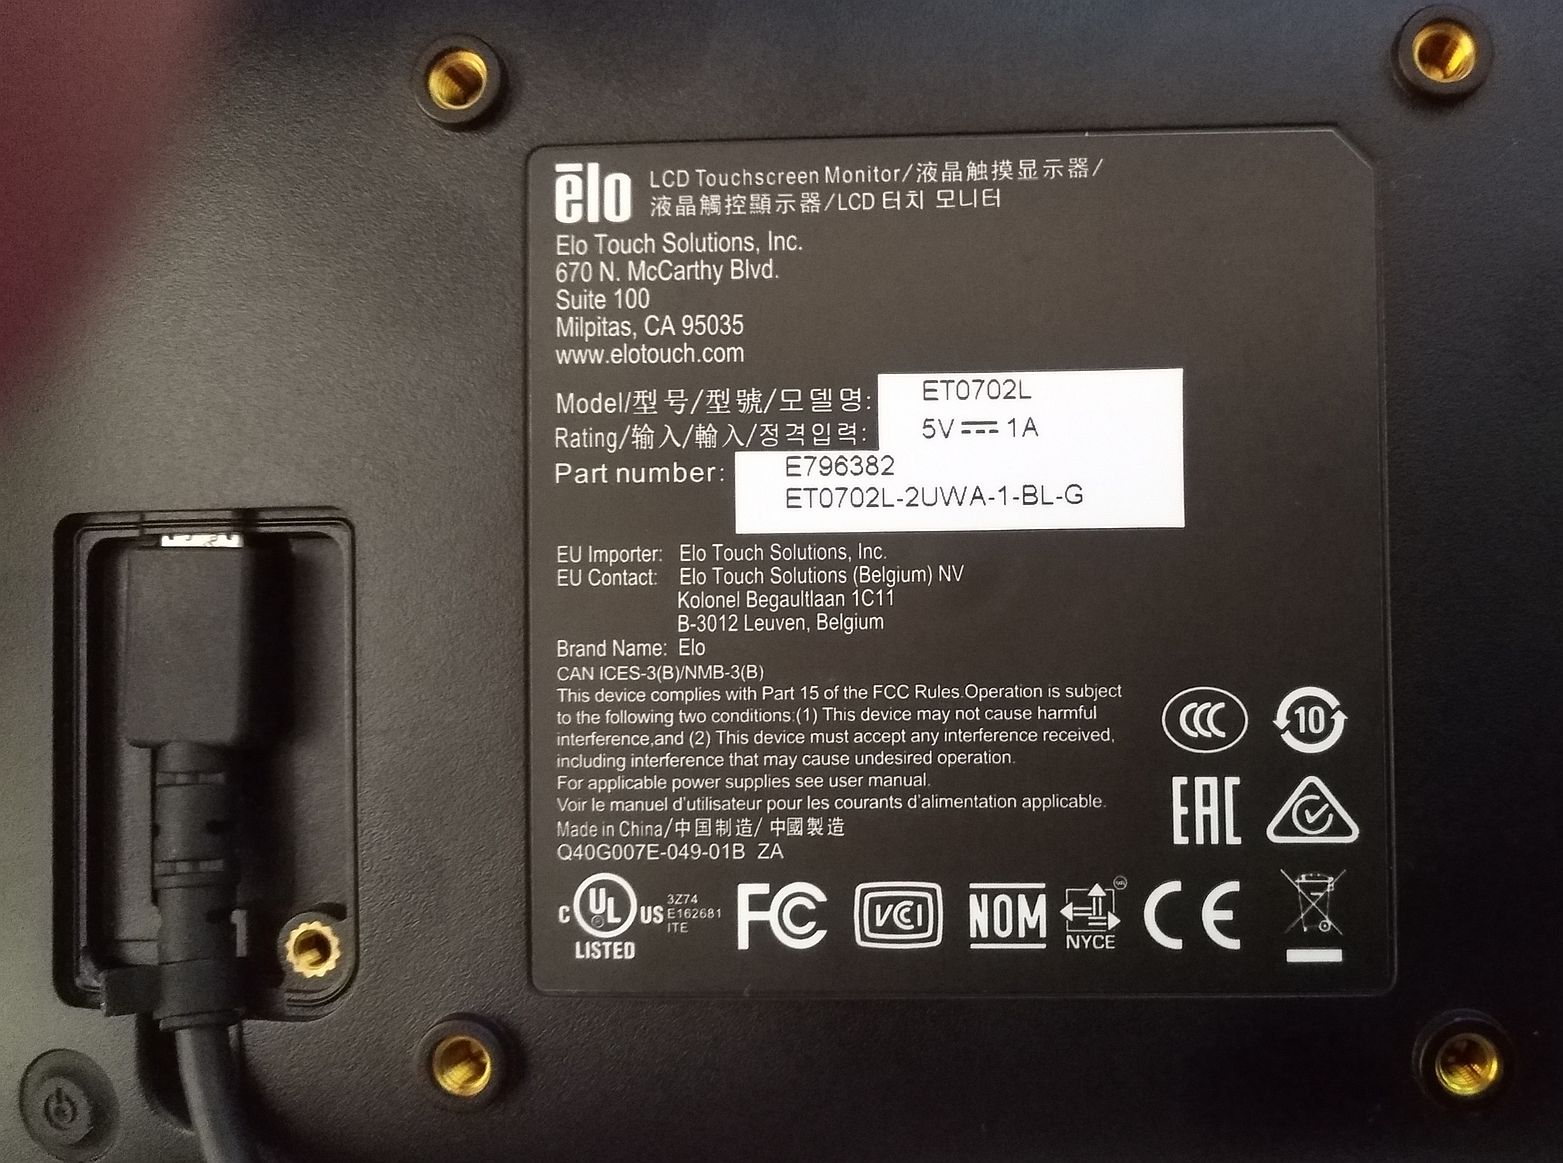
Note: this screen uses 2 USB ports to get the 1A (due to 500MA max rating for USB port)
About
DisplayLink is a proprietary USB graphics chip with associated drivers and protocol. Windows has DisplayLink support built in, but other operating systems typically need some added software to make it go.
In Linux, the driver that you need is called udlfb, which is provided as a kernel module. This module should already be there on recent Raspbian builds; I didn’t have to do anything to get it.
In Linux, the DisplayLink device appears to the system as a framebuffer, which is a hardware-independent API for accessing video memory, a.k.a. you just need a way for your Raspberry Pi system to output whatever you want to display to a framebuffer.
The udlfb driver talks to the DisplayLink screen via USB and exposes that interface through the Linux framebuffer device at /dev/fb1
Connecting
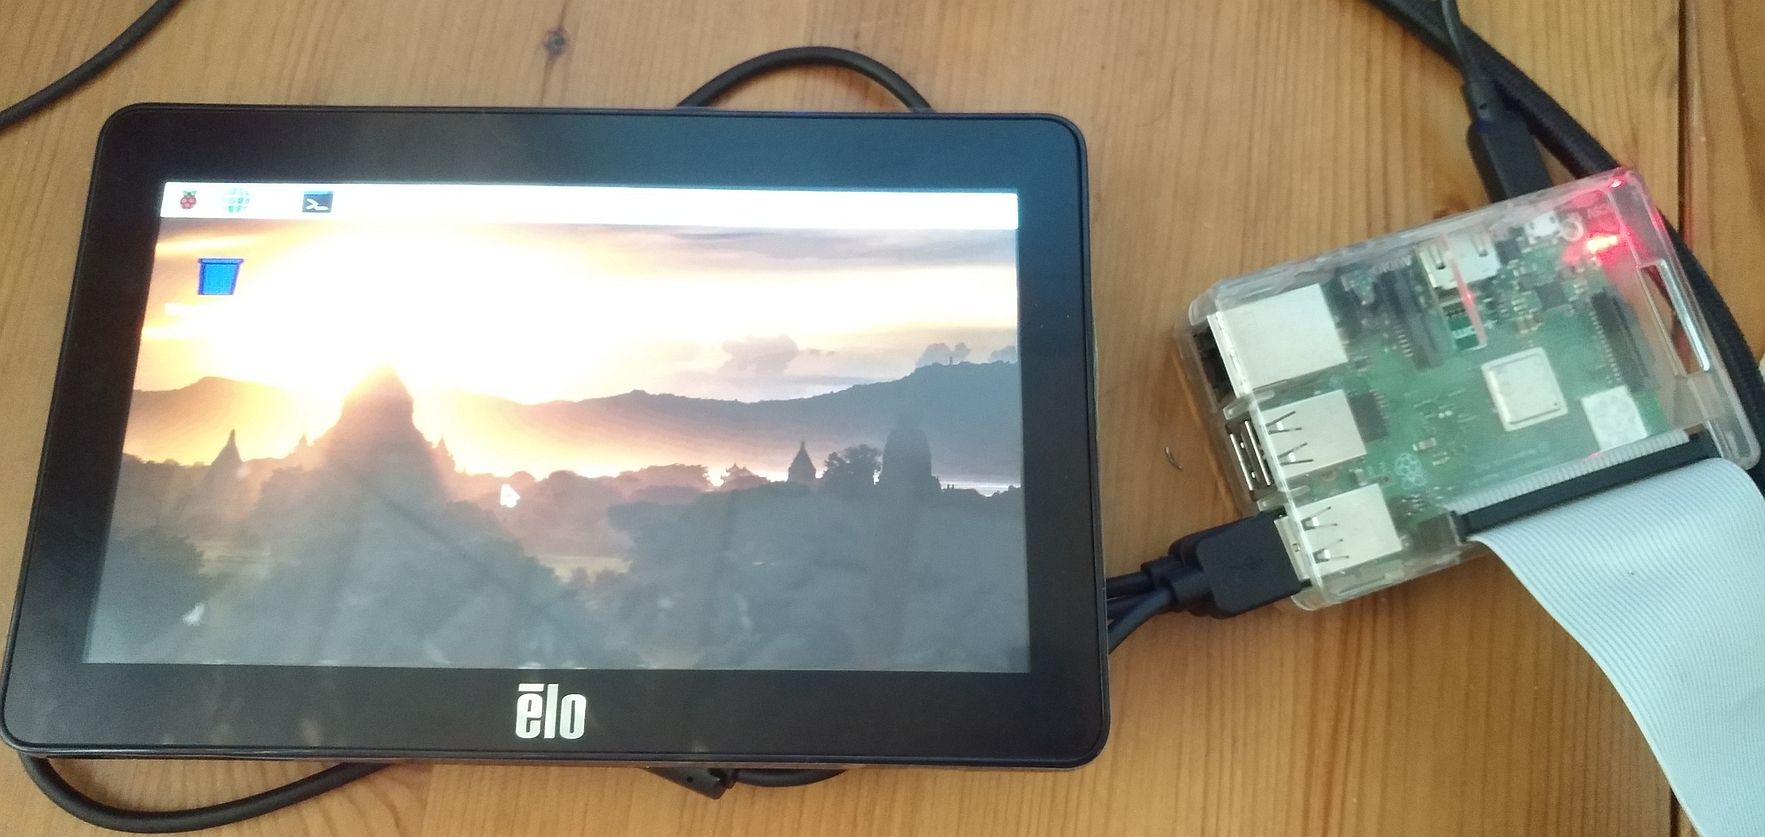
Note: we used a Raspberry Pi 3 B+ with Buster OS
When you connect the USB cables to the Pi, the screen will be recognized as 2 devices (1) touch (2) screen:
|
1 2 3 4 5 6 7 8 9 10 11 12 13 14 15 16 |
usb 1-1.2.1: new full-speed USB device number 13 using dwc_otg usb 1-1.2.1: New USB device found, idVendor=04e7, idProduct=1080, bcdDevice=93.05 usb 1-1.2.1: New USB device strings: Mfr=1, Product=2, SerialNumber=0 usb 1-1.2.1: Product: SiS HID Touch Controller usb 1-1.2.1: Manufacturer: Silicon Integrated System Co. input: Silicon Integrated System Co. SiS HID Touch Controller as /devices/platform/soc/3f980000.usb/usb1/1-1/1-1.2/1-1.2.1/1-1.2.1:1.0/0003:04E7:1080.0009/input/input8 hid-multitouch 0003:04E7:1080.0009: input,hiddev97,hidraw2: USB HID v1.11 Mouse [Silicon Integrated System Co. SiS HID Touch Controller] on usb-3f980000.usb-1.2.1/input0 usb 1-1.2.2: new high-speed USB device number 14 using dwc_otg usb 1-1.2.2: New USB device found, idVendor=17e9, idProduct=03f9, bcdDevice= 1.12 usb 1-1.2.2: New USB device strings: Mfr=1, Product=2, SerialNumber=3 usb 1-1.2.2: Product: ET0702L usb 1-1.2.2: Manufacturer: DisplayLink usb 1-1.2.2: SerialNumber: B20H008576 udlfb 1-1.2.2:1.0: vendor descriptor length: 23 data: 17 5f 01 00 15 05 00 01 03 00 04 udlfb 1-1.2.2:1.0: DL chip limited to 700000 pixel modes usb 1-1.2.2: fb1 is DisplayLink USB device (800x480, 1504K framebuffer memory) |
|
1 2 |
Bus 001 Device 007: ID 17e9:03f9 DisplayLink Bus 001 Device 005: ID 04e7:1080 Elo TouchSystems |
in your device list you find a new framebuffer named fb1:
|
1 |
/dev/fb0 /dev/fb1 |
Note:
framebuffer 0 is the HDMI connection interface (unconnected)
framebuffer 1 is the ELO screen connected on USB (DisplayLink)
Using the screen
All you have to do is inform the X-Windows system that you have a monitor using that device and what driver it should use. To do that, you must edit (or create) the file /etc/X11/xorg.conf I had to create this file, and this is its entire contents:
You can use sudo nano /etc/X11/xorg.conf to create or edit the file, paste in these contents:
|
1 2 3 4 5 6 7 8 9 10 11 12 13 14 15 16 17 18 19 20 21 22 23 24 25 26 27 28 29 30 31 |
Section "ServerLayout" Identifier "Server Layout" Screen 0 "DisplayLinkScreen" 0 0 EndSection Section "Files" ModulePath "/usr/lib/xorg/modules" ModulePath "/usr/local/lib/xorg/modules" ModulePath "/usr/local/lib/xorg/modules/drivers" EndSection Section "Device" Identifier "DisplayLinkDevice" Driver "fbdev" Option "fbdev" "/dev/fb1" #Option "ShadowFB" "off" EndSection Section "Monitor" Identifier "DisplayLinkMonitor" EndSection Section "Screen" Identifier "DisplayLinkScreen" Device "DisplayLinkDevice" Monitor "DisplayLinkMonitor" SubSection "Display" Depth 16 Modes "800x480" EndSubSection EndSection |
The Identifier values are meaningless, it’s only important that the references in the Screen section are correct. The important part is the Driver and Option keys in the Device section, where we tell X that we have an fbdev device and that it is located at /dev/fb1.
Once you have set all of this up, you should be able to reboot the Pi with only your DisplayLink monitor plugged in and see your GUI desktop environment appear!
Sources: https://blog.aaronbieber.com/2020/01/06/raspberry-pi-on-displaylink.html
![]()
Example to use the second screen (framebuffer 1 / fb1) in PyGame on a Raspberry Pi,:
|
1 2 3 4 5 6 7 8 9 |
import os import pygame # init pygame on specific framebuffer os.putenv('SDL_FBDEV', '/dev/fb1') pygame.init() ... |
Touchscreen SDL coordinates off, workaround for this screen:
|
1 2 3 4 5 6 7 8 9 10 11 12 13 14 15 16 17 18 19 20 21 22 23 24 25 26 27 28 |
import evdev TDev = False print("Looking for touch screen...") devices = [evdev.InputDevice(fn) for fn in evdev.list_devices()] for device in devices: if device.name=="Silicon Integrated System Co. SiS HID Touch Controller": TDev = device if not TDev: print("No touchscreen found.") quit() print("Found " + TDev.name + " on "+TDev.fn) mx=-1 my=-1 mp=-1 for event in TDev.read_loop(): if event.type == evdev.ecodes.EV_ABS: if event.code == 0: mx = event.value elif event.code == 1: my = event.value elif event.code == 24: mp = event.value print("X : " + str(mx) + " Y : " + str(my) + " Pressure : " + str(mp)) |