ThingSpeak – Server software
![]()
ThingSpeak is an open source “Internet of Things” application and API to store and retrieve data from things using HTTP over the Internet or via a Local Area Network. With ThingSpeak, you can create sensor logging applications, location tracking applications, and a social network of things with status updates.
In addition to storing and retrieving numeric and alphanumeric data, the ThingSpeak API allows for numeric data processing such as timescaling, averaging, median, summing, and rounding. Each ThingSpeak Channel supports data entries of up to 8 data fields, latitude, longitude, elevation, and status. The channel feeds support JSON, XML, and CSV formats for integration into applications.
The ThingSpeak application also features time zone management, read/write API key management and JavaScript-based charts from Highslide Software / Torstein Hønsi.
Before You Begin
1. Install Ruby 2, RubyGems, Rails 4, git, and a database like MySQL
2. Download the application using git:
git clone git@github.com:iobridge/thingspeak.git
3. Change to the thingspeak directory and install the appropriate gems: sudo bundle install
Configuration
1. Set your database configuration file at config/database.yml (see config/database.yml.example for an example)
2. Create the database: rake db:create
3. Create the database tables: rake db:schema:load
Run The Application
1. Start the server: rails server
Your application will now be running at http://localhost:3000/
Changing Application Text
Make changes to
config/locales/en.yml
To avoid errors, please ensure your lines start with spaces, not tabs.
Set your application name using the ‘application_name’ key.
(Optional) Email Setup
Set your domain, user_name, and password in config/environment.rb
(Optional) Admin Setup
Open a rails console:
rails console or
RAILS_ENV=production rails console , depending on your environment
Add the admin user:
AdminUser.create!(email: 'YOUR_ADMIN_EMAIL@EXAMPLE.COM', password: 'YOUR_PASSWORD', password_confirmation: 'YOUR_PASSWORD')
Exit the rails console:
exit
Login via the admin web interface at: “http://YOUR_DOMAIN.COM/admin”
Installation on clean install of Ubuntu 12.04 LTS
|
1 2 3 4 5 6 7 8 9 10 11 |
sudo apt-get upgrade sudo apt-get -y install build-essential mysql-server mysql-client libmysqlclient-dev libxml2-dev libxslt-dev git-core curl rubygems \curl -sSL https://get.rvm.io | bash -s stable rvm install 2.1 git clone https://github.com/iobridge/thingspeak.git cd thingspeak bundle install cp config/database.yml.example config/database.yml rake db:create rake db:schema:load rails server |
Upgrading existing installations
|
1 2 3 |
git pull origin master bundle install rake db:migrate |
If your server is active you can restart it by going to the active terminal, hitting Ctrl-c, and then typing:
rails server
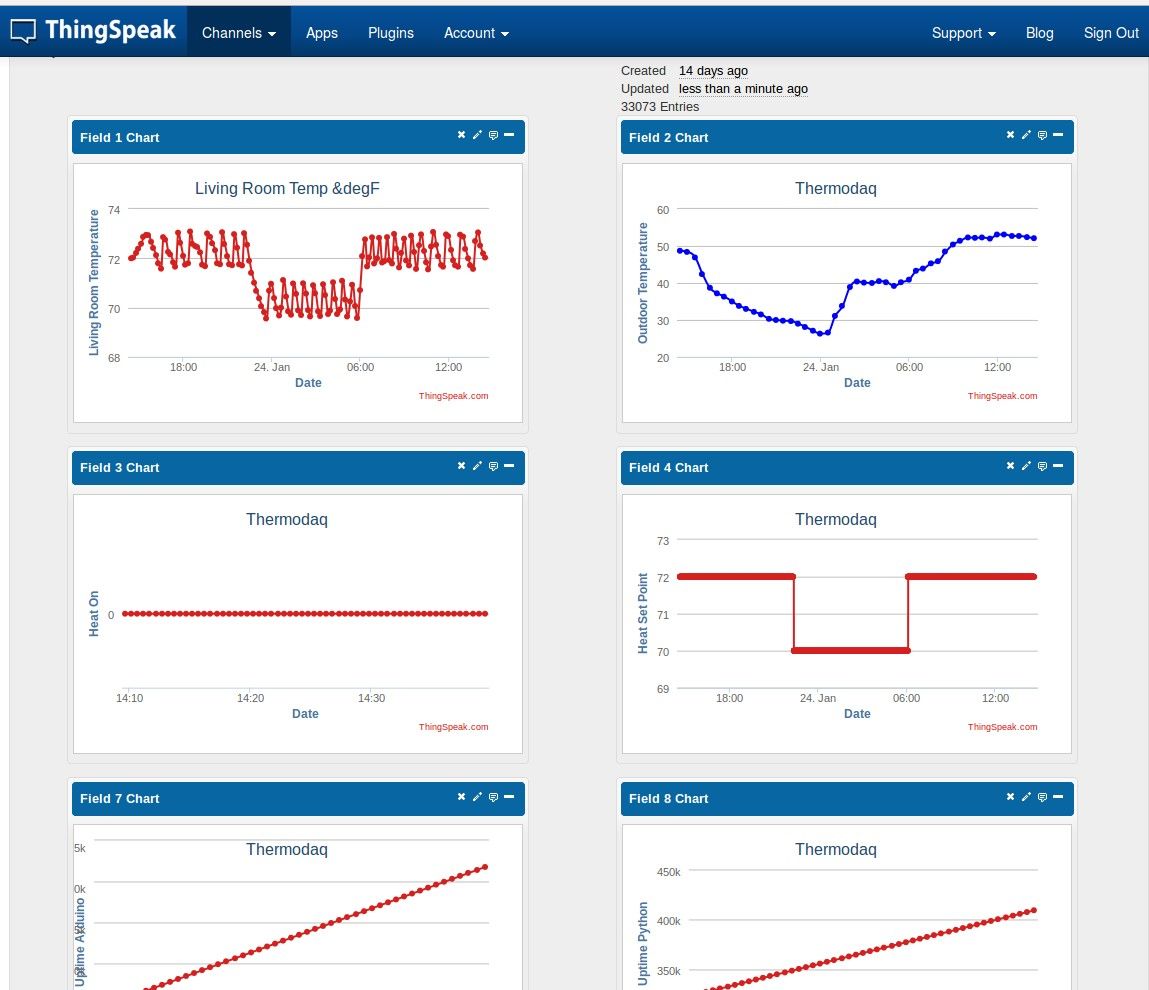
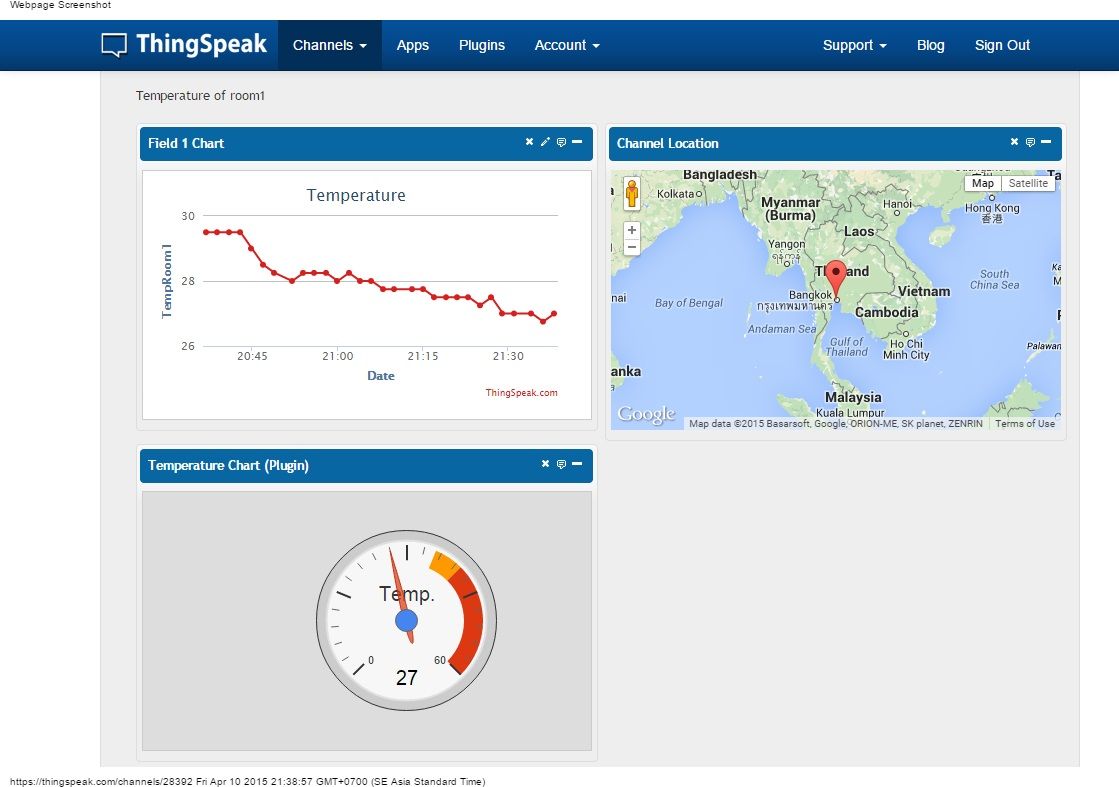
Screens