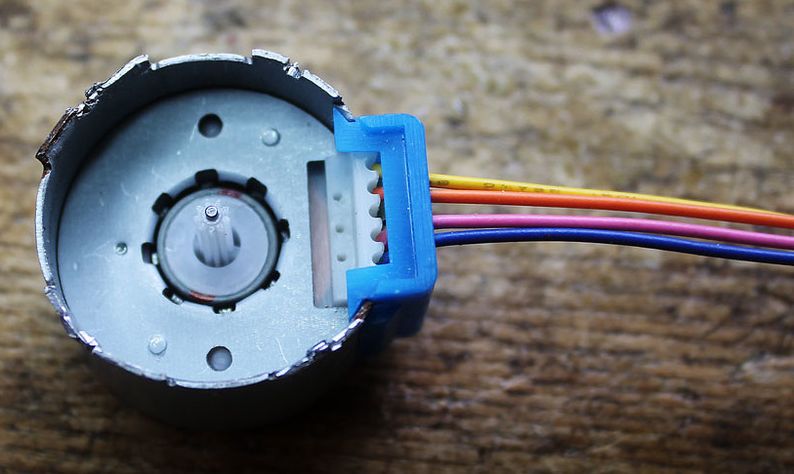
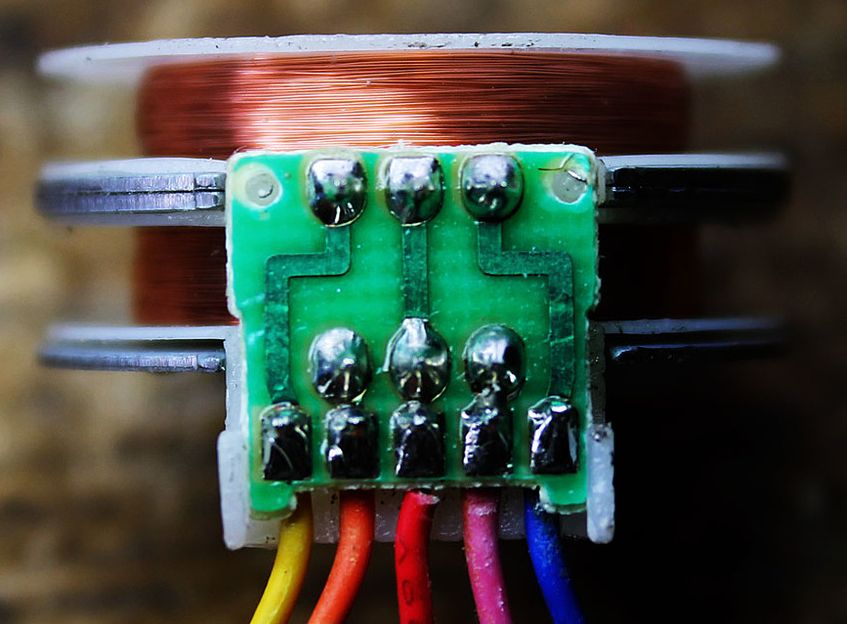
Motor – 28BYJ-48 – Stappenmotor
Hardware
Informatie (ENG):
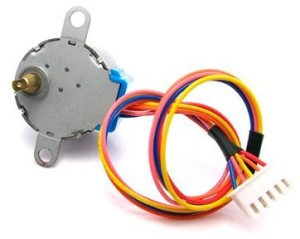
This small reduction 5-wire “28BYJ-48” stepper motor is a fantastic first stepper motor, great for experimenting with your raspberry pi and steppers. This uni-polar motor has a built in mounting plate with two mounting holes, and the motor shaft is flattened so it’s easy to attach stuff with a set screw! There are only 8 steps per revolution, but inside is a 1/64 reduction gear set which means that there are really 8*64 steps per revolution = 512 steps! A perfect first stepper motor.
Specificaties (ENG):
- Model : 28BYJ-48
- Rated voltage : 5VDC
- Number of Phase : 4
- Speed Variation Ratio : 1/64
- Stride Angle : 5.625° /64
- Frequency : 100Hz
- DC resistance : 50Ω±7%(25℃)
- Idle In-traction Frequency : > 600Hz
- Idle Out-traction Frequency : > 1000Hz
- In-traction Torque >34.3mN.m(120Hz)
- Self-positioning Torque >34.3mN.m
- Friction torque : 600-1200 gf.cm
- Pull in torque : 300 gf.cm
- Insulated resistance >10MΩ(500V)
- Insulated electricity power :600VAC/1mA/1s
- Insulation grade :A
- Rise in Temperature <40K(120Hz)
- Noise <35dB(120Hz,No load,10cm)
Pinout
Arduino
Wat heb je nodig?
Hoe werkt het?
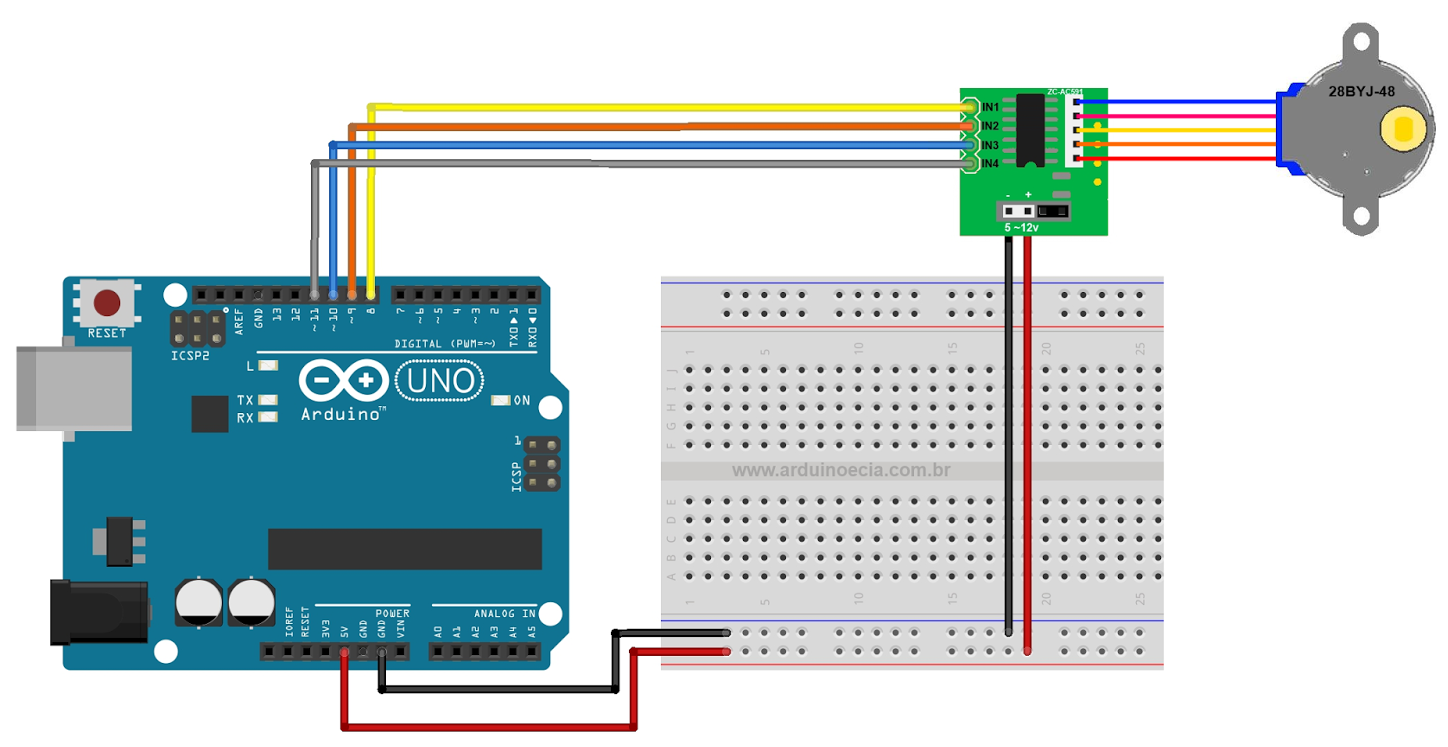
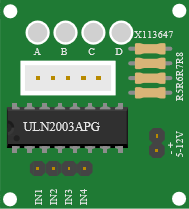
De motor werkt met 4 spoelen die met een bepaalde volgorde van aansturing de motor laten draaien, met behulp van de IC op het “driver board” heb je telkens 4 in/uitgangen hoog of laag te maken op de GPIO pinnen zodat de motor gaat draaien.
Sluit de 28BYJ-48 via de ULN2003A driver board aan zoals aangegeven op onderstaand schema:
Het standaard script voor werking van de stappenmotor
|
1 2 3 4 5 6 7 8 9 10 11 12 13 14 15 16 17 18 19 20 21 22 23 24 25 26 27 28 29 30 31 32 33 34 35 36 37 38 39 40 41 42 43 44 45 46 47 48 49 50 51 52 53 54 55 56 57 58 59 60 61 62 63 64 65 66 67 68 69 70 71 72 73 74 75 76 77 78 79 80 81 82 83 84 |
int Pin0 = 8; int Pin1 = 9; int Pin2 = 10; int Pin3 = 11; int _step = 0; boolean dir = true;// gre void setup() { pinMode(Pin0, OUTPUT); pinMode(Pin1, OUTPUT); pinMode(Pin2, OUTPUT); pinMode(Pin3, OUTPUT); } void loop() { switch(_step){ case 0: digitalWrite(Pin0, LOW); digitalWrite(Pin1, LOW); digitalWrite(Pin2, LOW); digitalWrite(Pin3, HIGH); break; case 1: digitalWrite(Pin0, LOW); digitalWrite(Pin1, LOW); digitalWrite(Pin2, HIGH); digitalWrite(Pin3, HIGH); break; case 2: digitalWrite(Pin0, LOW); digitalWrite(Pin1, LOW); digitalWrite(Pin2, HIGH); digitalWrite(Pin3, LOW); break; case 3: digitalWrite(Pin0, LOW); digitalWrite(Pin1, HIGH); digitalWrite(Pin2, HIGH); digitalWrite(Pin3, LOW); break; case 4: digitalWrite(Pin0, LOW); digitalWrite(Pin1, HIGH); digitalWrite(Pin2, LOW); digitalWrite(Pin3, LOW); break; case 5: digitalWrite(Pin0, HIGH); digitalWrite(Pin1, HIGH); digitalWrite(Pin2, LOW); digitalWrite(Pin3, LOW); break; case 6: digitalWrite(Pin0, HIGH); digitalWrite(Pin1, LOW); digitalWrite(Pin2, LOW); digitalWrite(Pin3, LOW); break; case 7: digitalWrite(Pin0, HIGH); digitalWrite(Pin1, LOW); digitalWrite(Pin2, LOW); digitalWrite(Pin3, HIGH); break; default: digitalWrite(Pin0, LOW); digitalWrite(Pin1, LOW); digitalWrite(Pin2, LOW); digitalWrite(Pin3, LOW); break; } if(dir){ _step++; }else{ _step--; } if(_step>7){ _step=0; } if(_step<0){ _step=7; } delay(1); } |
Script met “CustomStepper” Library
Wat heb je nodig?
1) Arduino CustomStepper bibliotheek
Onderstaand script laat de stappenmotor draaien, je kan het toerental instellen met: stepper.setRPM(12);
|
1 2 3 4 5 6 7 8 9 10 11 12 13 14 15 16 17 18 19 20 21 22 23 24 25 26 27 28 29 30 31 32 33 34 35 36 37 38 39 40 41 42 43 44 45 46 47 48 49 50 51 52 53 54 55 56 57 58 59 60 61 62 63 64 65 66 67 68 69 70 71 72 73 74 |
//Copyright 2012 Igor Campos // //This file is part of CustomStepper. // //CustomStepper is free software: you can redistribute it and/or modify //it under the terms of the GNU General Public License as published by //the Free Software Foundation, either version 3 of the License, or //(at your option) any later version. // //CustomStepper is distributed in the hope that it will be useful, //but WITHOUT ANY WARRANTY; without even the implied warranty of //MERCHANTABILITY or FITNESS FOR A PARTICULAR PURPOSE. See the //GNU General Public License for more details. // //You should have received a copy of the GNU General Public License //along with CustomStepper. If not, see <http://www.gnu.org/licenses/>. #include <CustomStepper.h> //Full constructor, just the first 4 parameters are necessary, they are the pins connected to the motor, //the others are optional, and default to the following below //the 5th paramater is the steps sequence, where the 1st element of the array is the number of steps //it can have a maximum of 8 steps //the 6th parameter is the SPR (Steps Per Rotation) //the 7th parameter is the RPM //the 8th parameter is the rotation orientation CustomStepper stepper(8, 9, 10, 11, (byte[]){8, B1000, B1100, B0100, B0110, B0010, B0011, B0001, B1001}, 4075.7728395, 12, CW); boolean rotate1 = false; boolean rotatedeg = false; boolean crotate = false; void setup() { //sets the RPM stepper.setRPM(12); //sets the Steps Per Rotation, in this case it is 64 * the 283712/4455 annoying ger ratio //for my motor (it works with float to be able to deal with these non-integer gear ratios) stepper.setSPR(4075.7728395); } void loop() { //when a command is finished it the isDone will return true, it is important to notice that //you can't give one command just after another since they don't block the execution, //which allows the program to control multiple motors if (stepper.isDone() && rotate1 == false) { //this method sets the direction of rotation, has 3 allowed values (CW, CCW, and STOP) //clockwise and counterclockwise for the first 2 stepper.setDirection(CCW); //this method sets the motor to rotate a given number of times, if you don't specify it, //the motor will rotate untilyou send another command or set the direction to STOP stepper.rotate(2); rotate1 = true; } if (stepper.isDone() && rotate1 == true && rotatedeg == false) { stepper.setDirection(CW); //this method makes the motor rotate a given number of degrees, it works with float //you can give angles like 90.5, but you can't give negative values, it rotates to the direction currently set stepper.rotateDegrees(90); rotatedeg = true; } if (stepper.isDone() && rotatedeg == true && crotate == false) { stepper.setDirection(CCW); //this will rotate until you stop it with another comand or set the direction to STOP stepper.rotate(); crotate = true; } //this is very important and must be placed in your loop, it is this that makes the motor steps //when necessary stepper.run(); } |
Raspberry Pi
Wat heb je nodig?
1) ULN2003 Driver Board (hardware)
2) Python RPi.GPIO bibliotheek (standaard geïnstalleerd op een Rasbian image)
Hoe werkt het?
De motor werkt met 4 spoelen die met een bepaalde volgorde van aansturing de motor laten draaien, met behulp van de IC op het “driver board” heb je telkens 4 in/uitgangen hoog of laag te maken op de GPIO pinnen zodat de motor gaat draaien.
Sluit de 28BYJ-48 via de ULN2003A driver board aan op de Raspberry Pi zoals aangegeven op onderstaand schema (de kruising in de kabel is al met de standaard connector toegepast):
| Raspberry GPIO pin: | Driver board: |
|---|---|
| GPIO4 | Pin 1 |
| GPIO17 | Pin 2 |
| GPIO27 | Pin 3 |
| GPIO22 | Pin 4 |
Script
Het standaard script voor werking van de stappenmotor, ik heb commentaar regels toegevoegd om e.e.a. toe te lichten.
Maak een bestand aan, bijvoorbeeld /usr/src/stappenmotor.py (evt onder root, en vergeet niet chmod te gebruiken om het bestand uit te kunnen voeren), voeg deze inhoud daar in toe:
|
1 2 3 4 5 6 7 8 9 10 11 12 13 14 15 16 17 18 19 20 21 22 23 24 25 26 27 28 29 30 31 32 33 34 35 36 37 38 39 40 41 42 43 44 45 46 47 48 49 50 51 52 53 54 55 56 57 58 59 60 61 62 63 64 65 66 67 68 69 70 71 |
!/bin/python # importeer de GPIO bibliotheek. import RPi.GPIO as GPIO # Importeer de time biblotheek voor tijdfuncties. from time import sleep # Zet de pinmode op Broadcom SOC. GPIO.setmode(GPIO.BCM) # Zet waarschuwingen uit. GPIO.setwarnings(False) # Stel de GPIO pinnen in voor de stappenmotor: StepPins = [4,17,27,22] # Set alle pinnen als uitgang. for pin in StepPins: print "Setup pins" GPIO.setup(pin,GPIO.OUT) GPIO.output(pin, False) # Definieer variabelen. StepCounter = 0 # Definieer simpele volgorde StepCount1 = 4 Seq1 = [] Seq1 = range(0, StepCount1) Seq1[0] = [1,0,0,0] Seq1[1] = [0,1,0,0] Seq1[2] = [0,0,1,0] Seq1[3] = [0,0,0,1] # Definieer geadvanceerde volgorde (volgens de datasheet) StepCount2 = 8 Seq2 = [] Seq2 = range(0, StepCount2) Seq2[0] = [1,0,0,0] Seq2[1] = [1,1,0,0] Seq2[2] = [0,1,0,0] Seq2[3] = [0,1,1,0] Seq2[4] = [0,0,1,0] Seq2[5] = [0,0,1,1] Seq2[6] = [0,0,0,1] Seq2[7] = [1,0,0,1] # Welke stappenvolgorde gaan we hanteren? Seq = Seq2 StepCount = StepCount2 try: while True: for pin in range(0, 4): xpin = StepPins[pin] if Seq[StepCounter][pin]!=0: print "Stap: %i GPIO Actief: %i" %(StepCounter,xpin) GPIO.output(xpin, True) else: GPIO.output(xpin, False) StepCounter += 1 # Als we aan het einde van de stappenvolgorde zijn beland start dan opnieuw if (StepCounter==StepCount): StepCounter = 0 if (StepCounter<0): StepCounter = StepCount # Wacht voor de volgende stap (lager = snellere draaisnelheid) sleep(.001) except KeyboardInterrupt: # GPIO netjes afsluiten GPIO.cleanup() |
Start het script met: sudo python /usr/src/servo.py , druk op CTRL+C om het script te stoppen!
De console output ziet er zo uit (gaat vrij snel)
LET OP: Een te korte wachttijd resulteert niet altijd in sneller draaien!, soms gaat het te snel en kunnen de GPIO poorten of de stappenmotor het niet meer bijhouden, dit resulteert soms dat de motor moeilijk of helemaal niet draait!
Simpele stappenvolgorde gebruiken
Wil je de simpele stappen volgorde gebruiken, varander dan deze 2 regels:
|
1 2 |
Seq = Seq2 StepCount = StepCount2 |
in:
|
1 2 |
Seq = Seq1 StepCount = StepCount1 |
Omdat de stappenvolgorde 2x minder is, pas ook de wachttijd aan (2x langzamer): sleep(.002)
Bron: raspberrypi-spy.co.uk
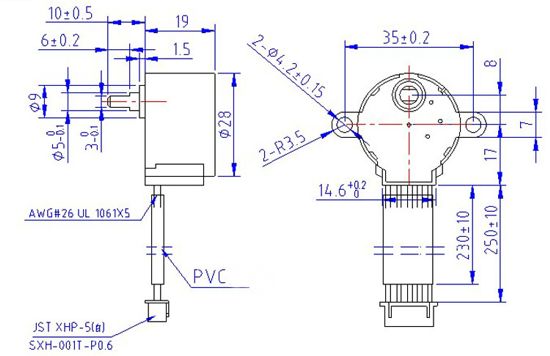
Afmetingen
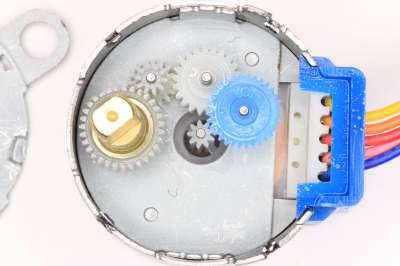
Teardown
The drive shaft gear has 9t.
That drives the 32t side of the blue reduction gear.
The 11t side of the blue gear drives the 22t idler gear (this has no step-up or down)
The 22t idler drives the 16t side of the white reduction gear.
The 10t side of the white gear drives the 31t gear on the output shaft.
Turning the crank on the numbers I get a ratio of 16.032.
Bronnen:
http://www.jangeox.be/2013/10/stepper-motor-28byj-48_25.html
https://stargazerslounge.com/topic/276410-converting-28byj-48-stepper-to-bipolar-for-microstepping/
Datasheet
Fritzing
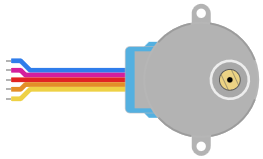
Fritzing – 28BYJ-48 Stepper Motor
Downloads
GEEN GEGEVENS


