DYMO – Raspberry Pi
![]()
We will setup our printer server software CUPS on the Pi. A computer (Raspberry Pi) running CUPS is able to accept jobs from client devices, process them and pass it on to the appropriate printer to print.
Example connecting Dymo LabelWriter 450 (dmesg):
|
1 2 3 4 5 6 7 8 |
usb 1-1.1: new full-speed USB device number 3 using xhci_hcd usb 1-1.1: New USB device found, idVendor=0922, idProduct=0020, bcdDevice= 1.12 [usb 1-1.1: New USB device strings: Mfr=1, Product=2, SerialNumber=3 usb 1-1.1: Product: DYMO LabelWriter 450 usb 1-1.1: Manufacturer: DYMO usb 1-1.1: SerialNumber: 13102208463403 usblp 1-1.1:1.0: usblp0: USB Bidirectional printer dev 3 if 0 alt 0 proto 2 vid 0x0922 pid 0x0020 usbcore: registered new interface driver usblp |
Part 1: Install and configure CUPS
This is relatively easy and only requires a few steps.
1. Ensure your package repository information is up to date, then download and install cups:
|
1 2 |
sudo apt-get update sudo apt-get install cups |
We need to make some changes to the configuration file of CUPs. The config file can be edited using:
sudo nano /etc/cups/cupsd.conf
Change/add the following lines to the configuration file. These changes will allow us to interact with CUPS panels.
update the <Location> configurations to allow local user access:
|
1 2 3 4 5 6 7 8 9 10 11 12 13 14 15 16 17 18 19 20 |
<Location /> # Restrict access to the server... Order allow,deny Allow @local </Location> <Location /admin> # Restrict access to the admin pages... Order allow,deny Allow @local </Location> <Location /admin/conf> AuthType Default Require user @SYSTEM # Restrict access to the configuration files... Order allow,deny Allow @local </Location> |
Next we add the Pi user to the lpadmin group. This gives the Raspberry Pi the ability to perform administrative functions of CUPS without necessarily being a super user.
We need to ensure that CUPS is accessible across entire network.
Finally, restart CUPS to effect changes
or
Part 2: Install Dymo Printer Drivers
Install the printer-drivers-dymo package:
|
1 2 3 4 5 6 7 8 9 10 11 12 13 14 15 16 17 18 19 20 21 22 |
Reading package lists... Done Building dependency tree Reading state information... Done The following NEW packages will be installed: printer-driver-dymo 0 upgraded, 1 newly installed, 0 to remove and 0 not upgraded. Need to get 43.2 kB of archives. After this operation, 134 kB of additional disk space will be used. Get:1 http://mirror.serverius.net/raspbian/raspbian buster/main armhf printer-driver-dymo armhf 1.4.0-8 [43.2 kB] Fetched 43.2 kB in 0s (203 kB/s) Selecting previously unselected package printer-driver-dymo. (Reading database ... 222813 files and directories currently installed.) Preparing to unpack .../printer-driver-dymo_1.4.0-8_armhf.deb ... Unpacking printer-driver-dymo (1.4.0-8) ... Setting up printer-driver-dymo (1.4.0-8) ... Processing triggers for cups (2.2.10-6+deb10u4) ... Updating PPD files for cups-filters ... Updating PPD files for dymo ... Updating PPD files for escpr ... Updating PPD files for gutenprint ... Updating PPD files for hpcups ... Updating PPD files for postscript-hp ... |
part 3: Adding Printer to CUPS
This is the last and most easiest step to do. From your PC, connect to the same network as your Pi. Open a web browser and go to the CUPS homepage by entering your Pi’s IP address followed by “:631” which is port address on which CUPS is communicating. It may be different in case you changed the port. The browser may show a warning “Connection not secure”, click “Proceed Anyway”.
To know your Pi’s IP address, you can run the command hostname -I from your Pi. In my case, the web address is:
or from an other computer (example):
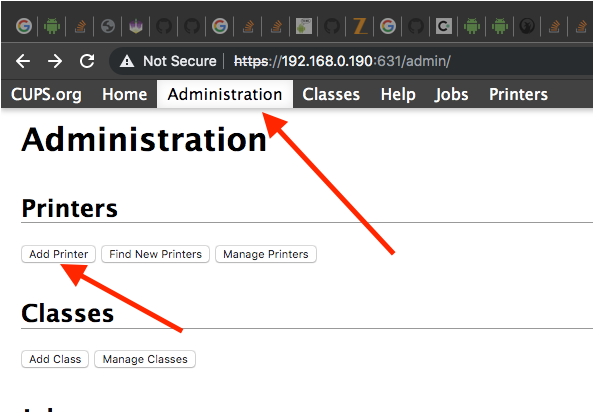
Go to Administration page and click Add Printer. Make sure that your printer is switch on and connected to your Pi via USB. Follow the prompts and setup the printer. Before the final step, ensure that you check the “share this printer” checkbox. Finally, you can print a test page on Printers page to verify if everything works.
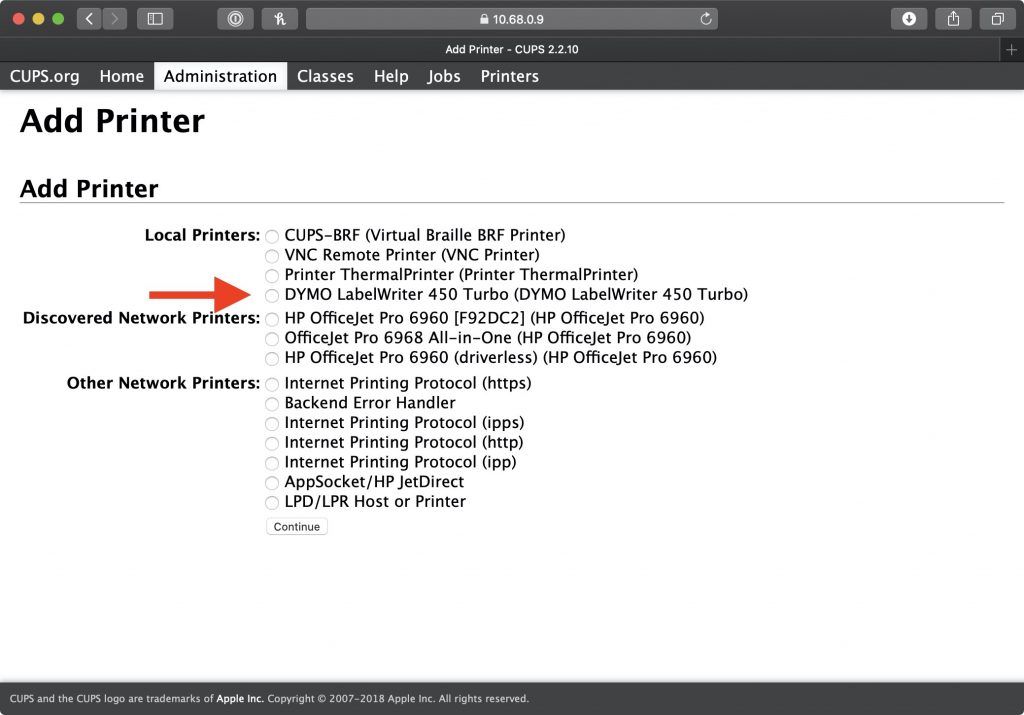
Select the DYMO printer:
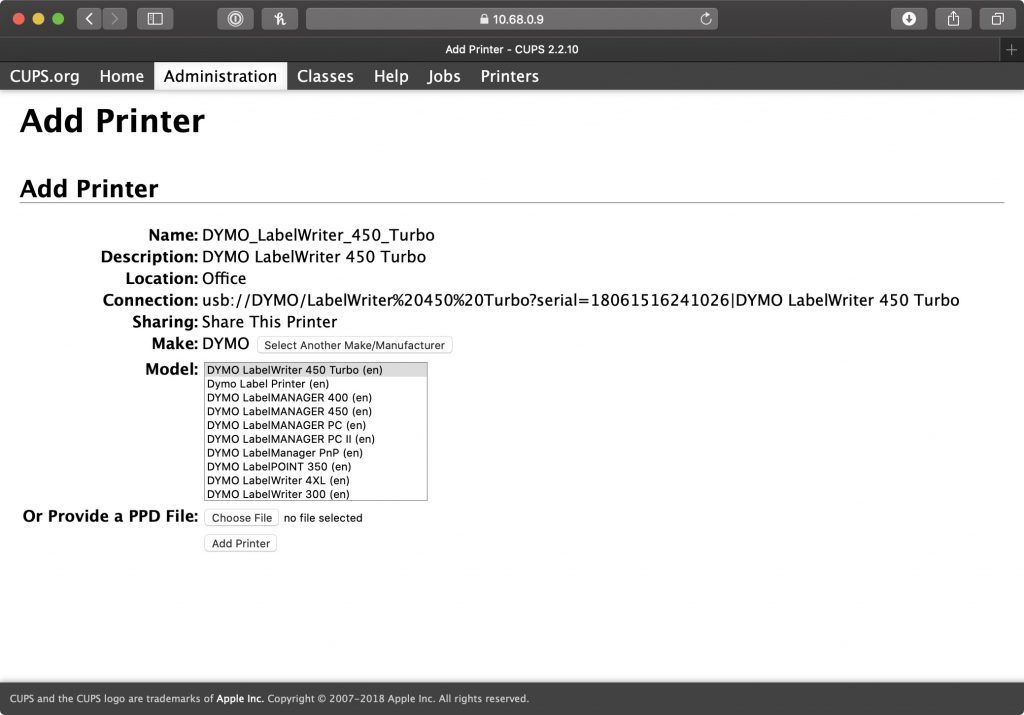
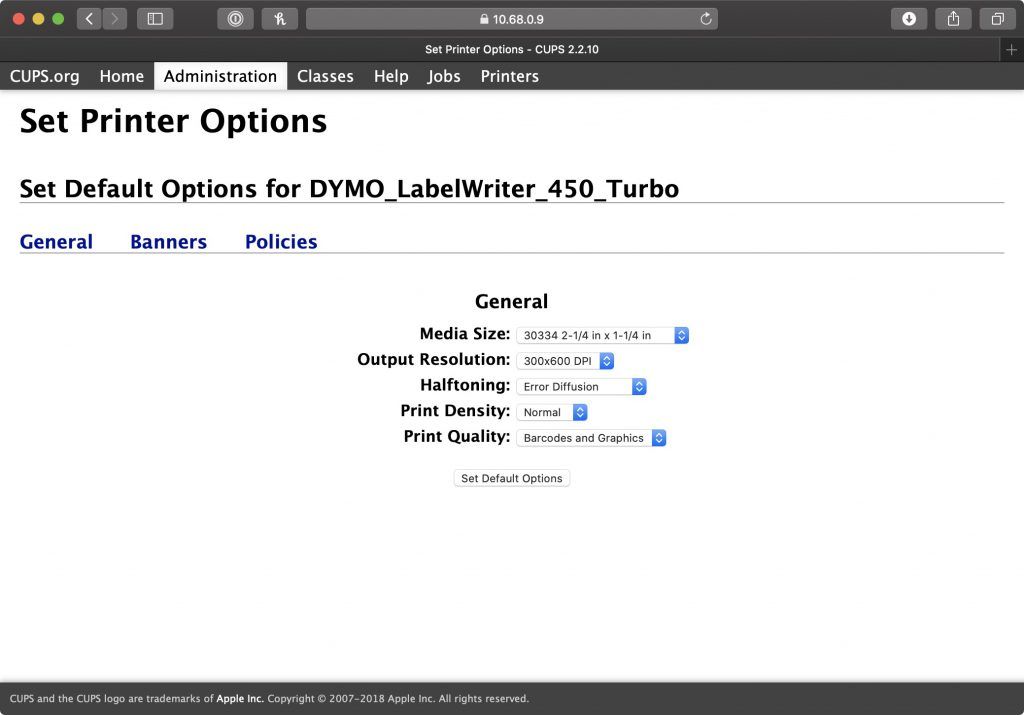
Lastly, and optionally, set some default print settings and wrap up the setup by clicking Set Default Options:
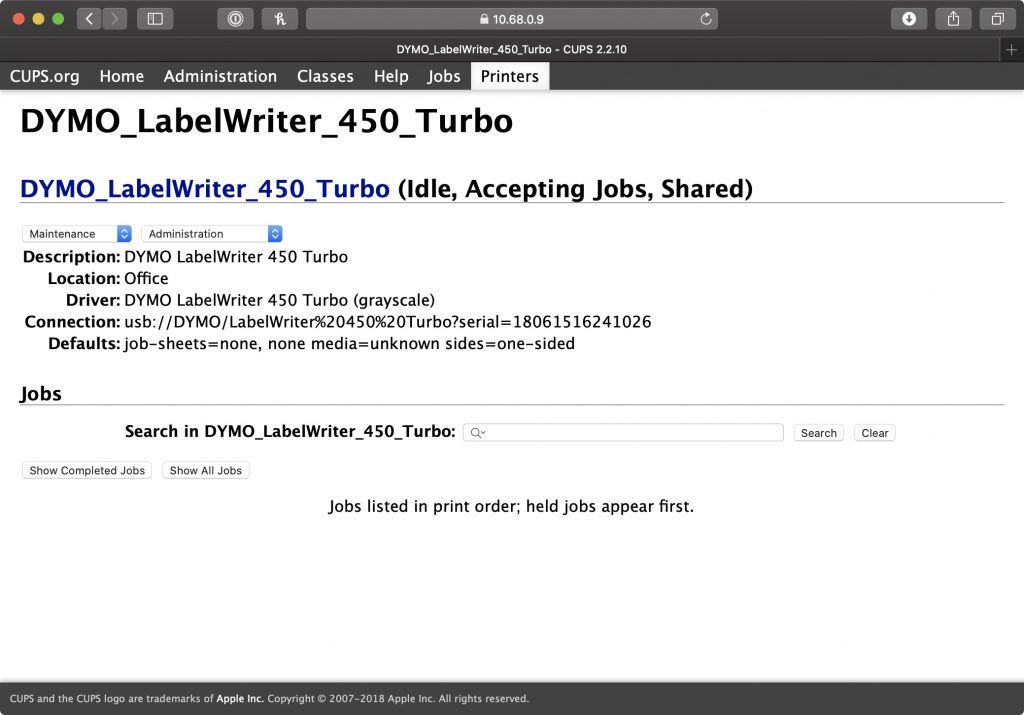
The printer should be set and ready to go, and visible from the CUPS admin page:
PS: After adding a printer, there was a problem occurred. For some reason, the printer would only print first few X jobs, and ignore the remaining jobs. To continue printing, I had to either restart my Pi, or restart my printer. The following command fixed my problem:
|
1 2 3 4 5 |
# Replace PRINTERNAME with the name used in step 7. Eg: m1136 lpadmin -p PRINTERNAME -o usb-no-reattach-default=true # Restart your Pi sudo reboot |
Python3 CUPS example
|
1 2 3 4 5 6 7 8 9 10 11 12 13 14 15 16 17 18 19 20 |
#!/usr/bin/python3 import time, pprint, cups conn = cups.Connection() printers = conn.getPrinters () pprint.pprint(printers) print() printer = conn.getDefault() print("Default1:", printer) if printer == None: printer = list(printers.keys())[0] print("Default2:", printer) myfile = "test.txt" pid = conn.printFile(printer, myfile, "test", {}) while conn.getJobs().get(pid, None) is not None: time.sleep(1) #done |
source(s):
https://johnathan.org/configure-a-raspberry-pi-as-a-print-server-for-dymo-label-printers/
https://medium.com/@anirudhgupta281998/setup-a-print-server-using-raspberry-pi-cups-part-2-2d6d48ccdc32
https://python-forum.io/thread-15230.html