IC – ATTINY – AVR Microcontroller programmeer platform
Hardware
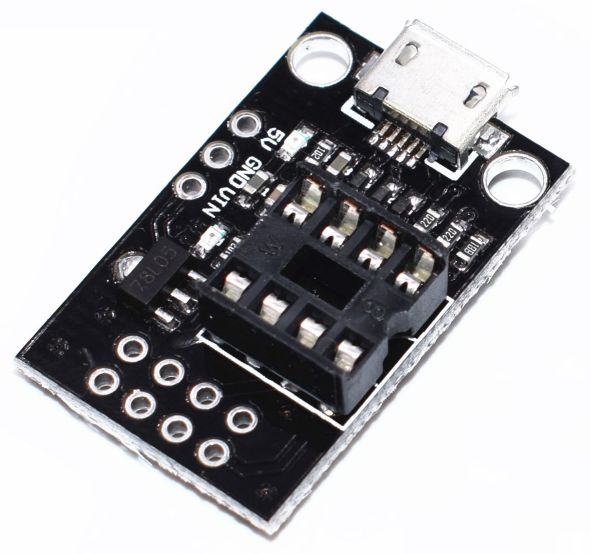
Met dit platform kan je eenvoudig ATTINY DIP chips programmeren via de USB, tevens te gebruiken als platform/microcontroller dmv uitgangen op de header pins, aansluiting d.m.v. USB-micro.
Specificaties (ENG):
– Support for the Arduino IDE 1.0+ (OSX/Win/Linux)
– Power via USB or External Source – 5v or 7-35v (12v or less recommended, automatic selection)
– On-board 500ma 5V Regulator
– Built-in USB
– 6 I/O Pins (2 are used for USB only if your program actively communicates over USB, otherwise you can use all 6 even if you are programming via USB)
– 8k Flash Memory (about 6k after bootloader)
– I2C and SPI (vis USI)
– PWM on 3 pins (more possible with Software PWM)
– ADC on 4 pins
– Power LED and Test/Status LED
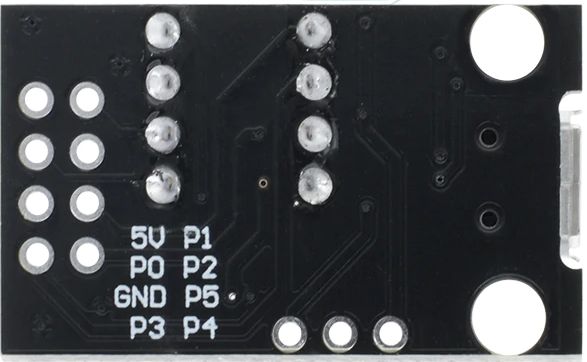
Pinout
Arduino
Bootloader micronucleus flashen
2) Download de ATtiny bootloader micronucleus
Het HEX bestand dat je nodig hebt is: firmware\releases\t85_default.hex
3) ArduinoIDE of AVRdude
4) Flash t85_defaul.hex met AVRdude via de arduino naar de ATTiny, belangrijk is dat je ook de fuses insteld
(Ps. pas nog de COM poort aan voor je eigen situatie)
avrdude -C avrdude.conf -c arduino -p t85 -P COM20 -b 19200 -U flash:w:t85_default.hex -U lfuse:w:0xe1:m -U hfuse:w:0xdd:m -U efuse:w:0xfe:m
|
1 2 3 4 5 6 7 8 9 10 11 12 13 14 15 16 17 18 19 20 21 22 23 24 25 26 27 28 29 30 31 32 33 34 35 36 37 38 39 40 41 42 43 44 45 46 47 48 49 50 51 52 53 54 55 56 57 58 59 60 61 62 63 64 65 66 67 68 69 70 71 72 73 74 |
avrdude: AVR device initialized and ready to accept instructions Reading | ################################################## | 100% 0.01s avrdude: Device signature = 0x1e930b (probably t85) avrdude: NOTE: "flash" memory has been specified, an erase cycle will be performed To disable this feature, specify the -D option. avrdude: erasing chip avrdude: reading input file "t85_default.hex" avrdude: input file t85_default.hex auto detected as Intel Hex avrdude: writing flash (8124 bytes): Writing | ################################################## | 100% 0.06s avrdude: 8124 bytes of flash written avrdude: verifying flash memory against t85_default.hex: avrdude: load data flash data from input file t85_default.hex: avrdude: input file t85_default.hex auto detected as Intel Hex avrdude: input file t85_default.hex contains 8124 bytes avrdude: reading on-chip flash data: Reading | ################################################## | 100% 0.06s avrdude: verifying ... avrdude: 8124 bytes of flash verified avrdude: reading input file "0xe1" avrdude: writing lfuse (1 bytes): Writing | ################################################## | 100% 0.01s avrdude: 1 bytes of lfuse written avrdude: verifying lfuse memory against 0xe1: avrdude: load data lfuse data from input file 0xe1: avrdude: input file 0xe1 contains 1 bytes avrdude: reading on-chip lfuse data: Reading | ################################################## | 100% 0.01s avrdude: verifying ... avrdude: 1 bytes of lfuse verified avrdude: reading input file "0xdd" avrdude: writing hfuse (1 bytes): Writing | ################################################## | 100% 0.01s avrdude: 1 bytes of hfuse written avrdude: verifying hfuse memory against 0xdd: avrdude: load data hfuse data from input file 0xdd: avrdude: input file 0xdd contains 1 bytes avrdude: reading on-chip hfuse data: Reading | ################################################## | 100% 0.01s avrdude: verifying ... avrdude: 1 bytes of hfuse verified avrdude: reading input file "0xfe" avrdude: writing efuse (1 bytes): Writing | ################################################## | 100% 0.01s avrdude: 1 bytes of efuse written avrdude: verifying efuse memory against 0xfe: avrdude: load data efuse data from input file 0xfe: avrdude: input file 0xfe contains 1 bytes avrdude: reading on-chip efuse data: Reading | ################################################## | 100% 0.01s avrdude: verifying ... avrdude: 1 bytes of efuse verified avrdude: safemode: Fuses OK (E:FE, H:DD, L:E1) avrdude done. Thank you. |
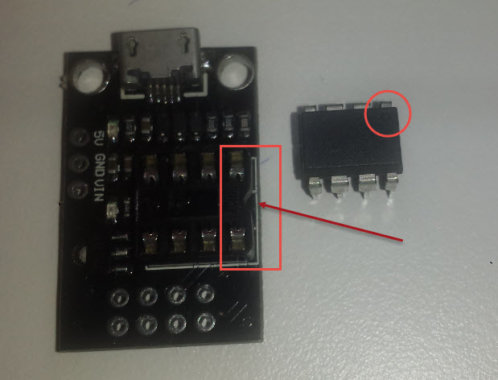
5) Na het programmeren plaats de ATTiny in de socket van het programmeer board en sluit de USB kabel aan op de computer.
Let er wel op dat je de ATTiny goed om in de socket plaatst:
Driver toewijzen
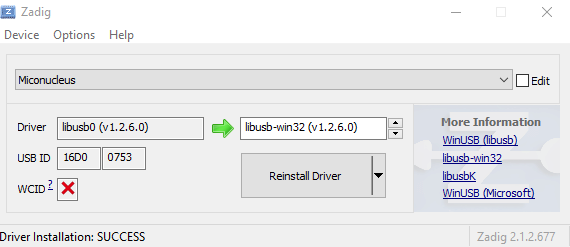
Gebruik het programma ZADIG om een USB driver toe te wijzen aan Micronucleus:
Na het toewijzen krijg je een bevestiging:
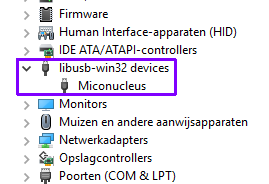
In Windows vind je in het apparaat beheer:
Code uploaden naar de ATTiny via de module
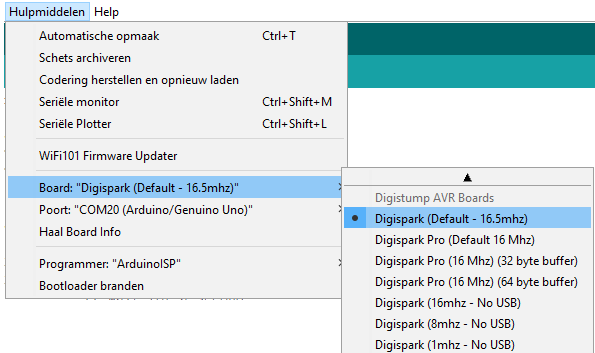
1) Digispark bord toevoegen aan Adruino IDE
2) Selecteer het digispark board (poort en programmer maakt niet uit):
3) Voorbeeld code om de LED op de module te laten knipperen:
|
1 2 3 4 5 6 7 8 9 10 11 12 13 14 15 16 |
// the setup routine runs once when you press reset: void setup() { // initialize the digital pin as an output. pinMode(0, OUTPUT); //LED on Model B pinMode(1, OUTPUT); //LED on Model A } // the loop routine runs over and over again forever: void loop() { digitalWrite(0, HIGH); // turn the LED on (HIGH is the voltage level) digitalWrite(1, HIGH); delay(100); // wait for a second digitalWrite(0, LOW); // turn the LED off by making the voltage LOW digitalWrite(1, LOW); delay(100); // wait for a second } |
4) Klik op upload (zorg er voor dat de module NIET aangekoppeld is), na het compileren van de code wordt gevraagd om de module aan te sluiten:
Zodra de module aangesloten is en gevonden door windows wordt het programma er op gezet:
|
1 2 3 4 5 6 7 8 9 10 11 12 13 14 15 16 17 18 19 20 21 22 23 |
> Device is found! connecting: 16% complete connecting: 22% complete connecting: 28% complete connecting: 33% complete > Device has firmware version 2.3 > Device signature: 0x1e930b > Available space for user applications: 6522 bytes > Suggested sleep time between sending pages: 7ms > Whole page count: 102 page size: 64 > Erase function sleep duration: 714ms parsing: 50% complete > Erasing the memory ... erasing: 55% complete erasing: 60% complete erasing: 65% complete > Starting to upload ... writing: 70% complete writing: 75% complete writing: 80% complete > Starting the user app ... running: 100% complete >> Micronucleus done. Thank you! |
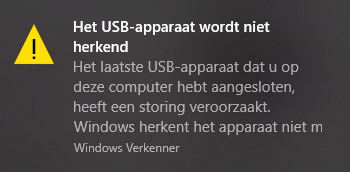
Na het uploaden kan je deze USB foutmelding krijgen (het programma is er dan inmiddels opgezet):
Bron(nen):
hackeduca.com
digistump.com
Afmetingen
GEEN GEGEVENS
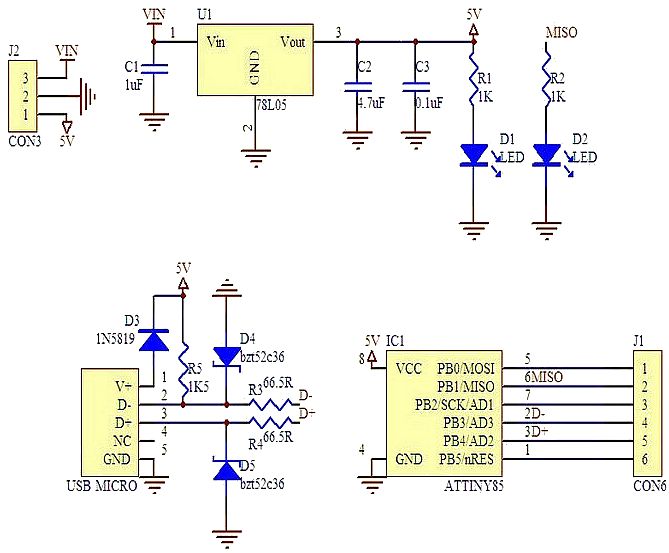
Schema
Teardown
GEEN GEGEVENS
Datasheet
GEEN GEGEVENS
Fritzing
GEEN GEGEVENS
Downloads
GEEN GEGEVENS


