NGINX – Poort toevoegen (Linux)
In dit voorbeeld laat zien hoe ik de LuCI interface/website via NGINX wilde laten lopen (omdat uhttpd er niet meer op staat), maar helaas kwam ik er later achter dat de NGINX op de smile geen CGI ondersteund, toch is dit erg leerzaam geweest en het delen waard!, tevens heb ik de Linux editor vi gebruikt, ook hier wordt wat uitleg over gegeven.
Welke poort(en) is/zijn bezet?
Je kan met het volgende commando zien welke poorten van het netwerk in gebruik zijn:
Linux commando:
netstat -nat
Output:
|
1 2 3 4 5 |
Active Internet connections (w/o servers) Proto Recv-Q Send-Q Local Address Foreign Address State tcp 0 100 192.168.1.102:22 192.168.1.104:1928 ESTABLISHED tcp 0 0 127.0.0.1:80 127.0.0.1:56356 TIME_WAIT netstat: /proc/net/tcp6: No such file or directory |
Hier zie je:
– Poort 22: SSH
– Poort 80: HTTP
In dit geval is poort 9000 nog niet gebruikt, deze kunnen we dus gebruiken voor uhttpd!
Om een poort toe te voegen moet je het configuratiebestand van NGINX bewerken: nginx.conf, deze is te vinden in /etc/nginx
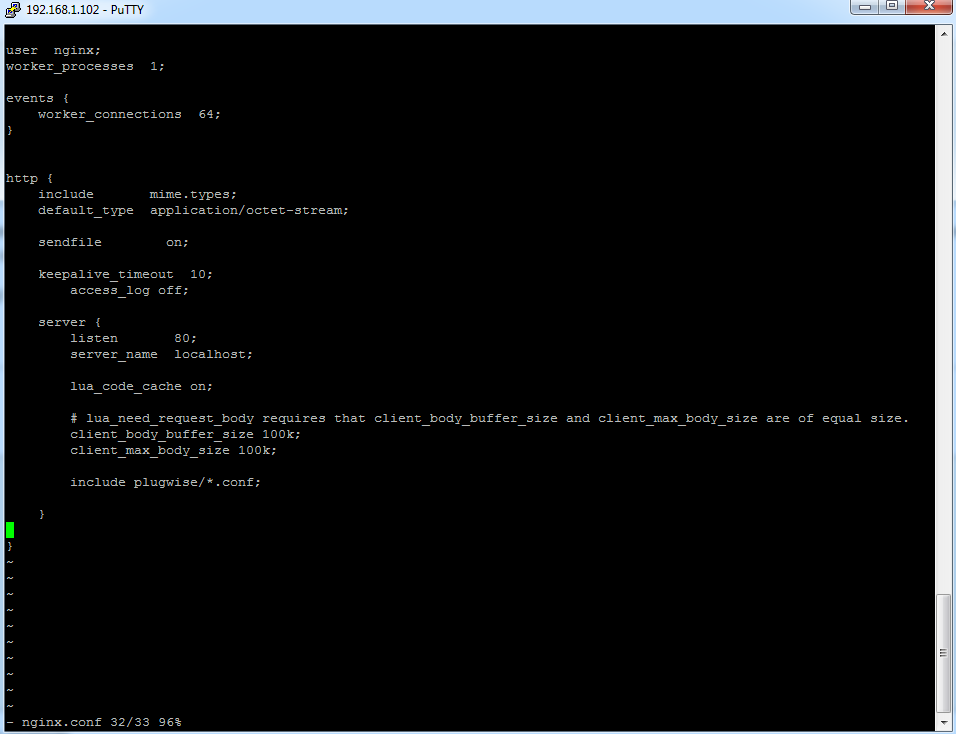
Standaard NGINX configuratie op de Plugwise smile (/etc/nginx/nginx.conf)
Linux commando:
cat /etc/nginx/nginx.conf
cat = geef de inhoud van een bestand weer.
|
1 2 3 4 5 6 7 8 9 10 11 12 13 14 15 16 17 18 19 20 21 22 23 24 25 26 27 28 29 30 31 32 |
user nginx; worker_processes 1; events { worker_connections 64; } http { include mime.types; default_type application/octet-stream; sendfile on; keepalive_timeout 10; access_log off; server { listen 80; server_name localhost; lua_code_cache on; # lua_need_request_body requires that client_body_buffer_size and client_max_body_size are of equal size. client_body_buffer_size 100k; client_max_body_size 100k; include plugwise/*.conf; } } |
Tip, Kijk of er een backup bestand aanwezig is genaamd “nginx.conf.org” aanwezig is, anders maak deze aan met het commando: “cp nginx.conf nginx.conf.org”
Er is op het internet veel documentatie te vinden over het instellen van NGINX, zoals hier.
In dit voorbeeld hieronder zetten we een extra “poort” open (9000) dat naar een specifieke locatie verwijst (uiteraard kan poort 8080 ook)
|
1 2 3 4 5 6 7 8 9 |
server { listen 9000; server_name localhost; location / { root ../www/; index index.html; } } |
Wat betekent dit?
listen = luister naar deze poort (nummer)
server_name = localhost; (standaard), je kan hier uiteraard ook iets van “forum.*;” gebruiken, zodat je de documentroot kan aanspreken met “forum.website.com”.
location = / (standaard), je kan hier uiteraard ook iets van “/forum” gebruiken, zodat je de documentroot kan aanspreken met “www.website.com\forum”.
root = de documentroot van de website, hier is ../ voorgezet (../www/) omdat we vanuit de root naar www gaan, anders gaat NGINXC in zijn eigen folder zoeken naar het pad.
index = index.html (standaard), je kan ook een astrix gebruiken of bijvoorbeeld ook “index.php”.
Dit stukje om een server te configureren moet dan staan tussen de “http” accolades “{ }”,
|
1 2 |
http { } |
Dus het geheel ziet er dan zo uit:
|
1 2 3 4 5 6 7 8 9 10 11 12 13 14 15 16 17 18 19 20 21 22 23 24 25 26 27 28 29 30 31 32 33 34 35 36 37 38 39 40 41 42 |
user nginx; worker_processes 1; events { worker_connections 64; } http { include mime.types; default_type application/octet-stream; sendfile on; keepalive_timeout 10; access_log off; server { listen 80; server_name localhost; lua_code_cache on; # lua_need_request_body requires that client_body_buffer_size and client_max_body_size are of equal size. client_body_buffer_size 100k; client_max_body_size 100k; include plugwise/*.conf; } server { listen 9000; server_name localhost; location / { root ../www/; index index.html; } } } |
Hoe ga je te werk?
Je kan met de Linux File Editor (vi) het config bestand bewerken en opslaan, meer informatie over vi is hier en hier te vinden:
1) Ga naar de NGINX folder, Linux commando: cd /etc/nginx
2) Open de File Editor met het nginx.conf bestand, Linux commando: vi nginx.conf
3) Ga naar de locatie toe met je pijltjes toetsen waar de eerste server{} instellingen eindigen:
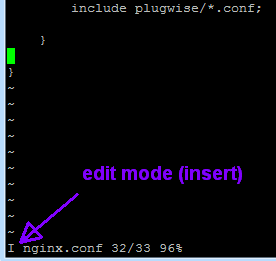
4) Druk nu op INSERT, je ziet nu een i (insert) verschijnen links onderin de editor:
5) Kopieer deze tekst met CTRL+C naar het Windows klembord:
|
1 2 3 4 5 6 7 8 9 |
server { listen 9000; server_name localhost; location / { root ../www/; index index.html; } } |
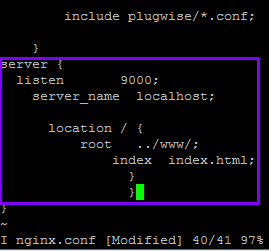
6) Ga terug naar de editor (putty) en klik 1x met de rechtermuisknop nu zal de tekst ingevoegd worden (de opmaak is niet helemaal netjes, maar dat maakt niet uit):
7) Na het invoegen druk je op ESC, de i onderin de editor verdwijnt en wordt weer een -, je kan nu weer de speciale commando’s gebruiken.
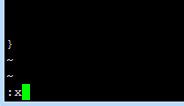
8) Typ nu hetvolgende in :x, met het indrukken van : gaat de cursor al naar linksonder en druk dan op ENTER.
9) Je komt nu weer uit op je bash commandline, het bestand is opgeslagen en de editor is afgesloten.
10) Echter om de wijzigingen van kracht te laten komen moet je NGINX opnieuw opstarten (het configuratiebestand wordt dan opnieuw ingelezen)
Met het Linux commando: nginx -h vragen we de instructies op voor nginx:
|
1 2 3 4 5 6 7 8 9 10 11 12 13 |
nginx version: nginx/1.2.1 Usage: nginx [-?hvVtq] [-s signal] [-c filename] [-p prefix] [-g directives] Options: -?,-h : this help -v : show version and exit -V : show version and configure options then exit -t : test configuration and exit -q : suppress non-error messages during configuration testing -s signal : send signal to a master process: stop, quit, reopen, reload -p prefix : set prefix path (default: /usr/) -c filename : set configuration file (default: /etc/nginx/nginx.conf) -g directives : set global directives out of configuration file |
Het commando om NGINX opnieuw op te starten is dan:
/etc/init.d/nginx -s reload
Je kan nu opnieuw met het Linux commando: netstat -nat controleren of er inderdaad geluisterd wordt naar poort 9000.
|
1 2 3 4 5 6 |
Active Internet connections (w/o servers) Proto Recv-Q Send-Q Local Address Foreign Address State tcp 0 100 192.168.1.102:22 192.168.1.104:1928 ESTABLISHED tcp 0 0 127.0.0.1:9000 127.0.0.1:56356 TIME_WAIT tcp 0 0 127.0.0.1:80 127.0.0.1:56356 TIME_WAIT netstat: /proc/net/tcp6: No such file or directory |
Hier zie je:
– Poort 22: SSH
– Poort 80: HTTP
– Poort 9000: HTTP
11) Je kan nu via een browser naar de site toegaan, door de poort achter het adres te zetten met een : (dubbele punt): http://192.168.1.X:9000


