Raspberry Pi – VNC – TightVNC server
Dit voorbeeld laat zien hoe je een VNC server op een Raspberry Pi installeert, zodat je “headless” een grafische verbinding kan leggen via een andere computer.
Je kan dan bijvoorbeeld met een Windows computer waar een TightVNC client op draait, de raspberry Pi overnemen.
Installatie
Installeer TightVNC met het volgende commando:
sudo apt-get -y install tightvncserver
|
1 2 3 4 5 6 7 8 9 10 11 12 13 14 15 16 17 18 19 20 21 22 23 24 25 26 27 28 29 30 31 32 33 34 35 36 37 38 39 40 41 42 43 44 45 46 47 48 |
Reading package lists... Done Building dependency tree Reading state information... Done The following packages were automatically installed and are no longer required: coinor-libipopt1 libboost-filesystem1.55.0 libboost-program-options1.55.0 libboost-regex1.55.0 libffi5 libgmime-2.6-0 libmumps-seq-4.10.0 liboauth0 libraw10 wolframscript Use 'apt-get autoremove' to remove them. The following extra packages will be installed: xfonts-base Suggested packages: tightvnc-java The following packages will be REMOVED: realvnc-vnc-server wolfram-engine The following NEW packages will be installed: tightvncserver xfonts-base 0 upgraded, 2 newly installed, 2 to remove and 0 not upgraded. Need to get 6,736 kB of archives. After this operation, 704 MB disk space will be freed. Get:1 http://mirrordirector.raspbian.org/raspbian/ jessie/main tightvncserver armhf 1.3.9-6.5 [555 kB] Get:2 http://mirrordirector.raspbian.org/raspbian/ jessie/main xfonts-base all 1:1.0.3 [6,181 kB] Fetched 6,736 kB in 1s (5,743 kB/s) (Reading database ... 112361 files and directories currently installed.) Removing wolfram-engine (11.0.1+2017022002) ... Removing realvnc-vnc-server (6.0.2.25562) ... (gconftool-2:1202): GConf-WARNING **: Client failed to connect to the D-BUS daemon: Unable to autolaunch a dbus-daemon without a $DISPLAY for X11 Processing triggers for man-db (2.7.0.2-5) ... Processing triggers for gnome-menus (3.13.3-6) ... Processing triggers for desktop-file-utils (0.22-1) ... Processing triggers for mime-support (3.58) ... Processing triggers for shared-mime-info (1.3-1) ... Processing triggers for hicolor-icon-theme (0.13-1) ... Processing triggers for gconf2 (3.2.6-3) ... Selecting previously unselected package tightvncserver. (Reading database ... 103208 files and directories currently installed.) Preparing to unpack .../tightvncserver_1.3.9-6.5_armhf.deb ... Unpacking tightvncserver (1.3.9-6.5) ... Selecting previously unselected package xfonts-base. Preparing to unpack .../xfonts-base_1%3a1.0.3_all.deb ... Unpacking xfonts-base (1:1.0.3) ... Processing triggers for man-db (2.7.0.2-5) ... Processing triggers for fontconfig (2.11.0-6.3+deb8u1) ... Setting up tightvncserver (1.3.9-6.5) ... update-alternatives: using /usr/bin/tightvncserver to provide /usr/bin/vncserver (vncserver) in auto mode update-alternatives: using /usr/bin/Xtightvnc to provide /usr/bin/Xvnc (Xvnc) in auto mode update-alternatives: using /usr/bin/tightvncpasswd to provide /usr/bin/vncpasswd (vncpasswd) in auto mode Setting up xfonts-base (1:1.0.3) ... |
Start nu de TightVNC server met het commando:
vncserver :1
Voer een wachtwoord in van max. 8 karakters, er wordt gevraagd voor het optionele wachtwoord voor “alleen weergave modus”.
|
1 2 3 4 5 6 7 8 9 10 11 |
You will require a password to access your desktops. Password: Verify: Would you like to enter a view-only password (y/n)? n New 'X' desktop is raspberrypi:1 Creating default startup script /home/pi/.vnc/xstartup Starting applications specified in /home/pi/.vnc/xstartup Log file is /home/pi/.vnc/raspberrypi:1.log |
Ps. het wachtwoord is ook (opnieuw) in te stellen met het commando: vncpassword
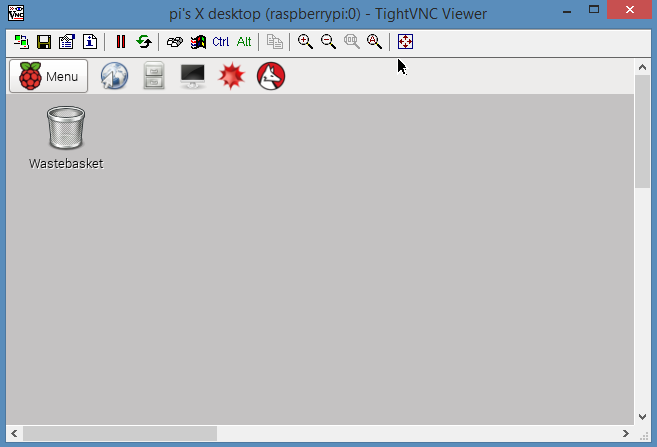
Nu is de VNC server gestart en kan men connectie maken met de VNC server doormiddel van een cliënt op een andere computer:
VNC starten bij het opstarten van de Raspberry Pi
Maak een bestand aan in de folder: /etc/init.d met een toepasselijke naam, bijvoorbeeld: vncserver (zonder extensie) met het commando:
sudo nano /etc/init.d/vncserver
Plaats in dit bestand de volgende inhoud:
|
1 2 3 4 5 6 7 8 9 10 11 12 13 14 15 16 17 18 19 20 21 22 23 24 25 26 27 28 29 30 31 32 33 34 35 36 37 38 39 40 41 42 43 44 45 46 47 48 49 50 51 52 |
#!/bin/sh -e ### BEGIN INIT INFO # Provides: vncserver # Required-Start: networking # Required-Stop: # Default-Start: S # Default-Stop: 0 6 ### END INIT INFO PATH="$PATH:/usr/X11R6/bin/" # The Username:Group that will run VNC export USER="pi" #${RUNAS} # The display that VNC will use DISPLAY="1" # Color depth (between 8 and 32) DEPTH="16" # The Desktop geometry to use. #GEOMETRY="<WIDTH>x<HEIGHT>" #GEOMETRY="800x600" GEOMETRY="1024x768" #GEOMETRY="1280x1024" # The name that the VNC Desktop will have. NAME="419_VNC" OPTIONS="-name ${NAME} -depth ${DEPTH} -geometry ${GEOMETRY} :${DISPLAY}" . /lib/lsb/init-functions case "$1" in start) log_action_begin_msg "Starting vncserver for user '${USER}' on localhost:${DISPLAY}" su ${USER} -c "/usr/bin/vncserver ${OPTIONS}" ;; stop) log_action_begin_msg "Stoping vncserver for user '${USER}' on localhost:${DISPLAY}" su ${USER} -c "/usr/bin/vncserver -kill :${DISPLAY}" ;; restart) $0 stop $0 start ;; esac exit 0 |
Geef het bestand rechten om uitgevoerd te mogen worden met het commando:
sudo chmod +x /etc/init.d/vncserver
Dan programma script toevoegen aan boot volgorde met het commando:
sudo update-rc.d vncserver defaults
Na reboot zal VNC automatisch worden gestart.


