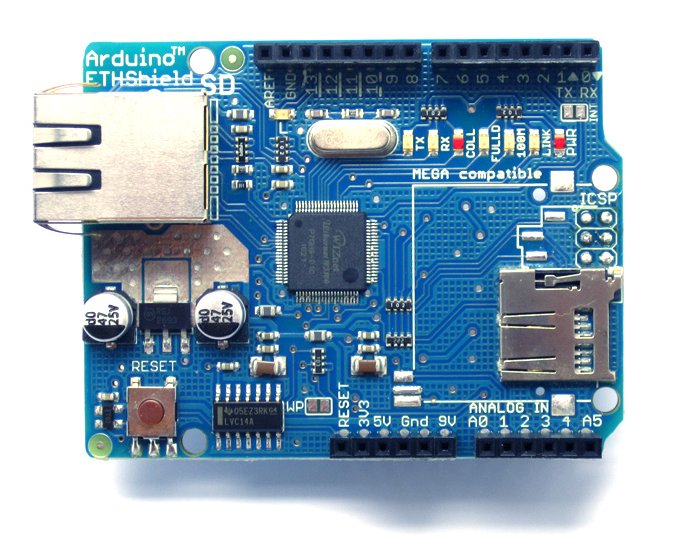
Arduino Shield – Ethernet W5100 – Modbus TCP/IP Slave
Hardware: Arduino Ethernet shield (W5100)
Klik hier voor meer informatie over deze Arduino shield
Het is mogelijk om een Modbus TCP/IP Slave te maken met deze shield, hieronder een aantal voorbeelden met diverse bibliotheken.
Voorbeeld met ARDUINO-MODBUS bibliotheek
Wat heb je nodig?
– arduino-modbus bibliotheek
|
1 2 3 4 5 6 7 8 9 10 11 12 13 14 15 16 17 18 19 20 21 22 23 24 25 26 27 28 29 30 31 32 33 34 35 36 |
#include <SPI.h> #include <Ethernet.h> #include <Modbus.h> #include <ModbusIP.h> // Modbus Registers Offsets (0-9999) int SENSOR_REG = 0; // Used Pins int sensorPin = A0; // ModbusIP object ModbusIP mb; long ts; void setup() { // The media access control (ethernet hardware) address for the shield byte mac[] = { 0xDE, 0xAD, 0xBE, 0xEF, 0xFE, 0xED }; byte ip[] = { 192, 168, 2, 28 }; mb.config(mac, ip); // Config Modbus IP // Add SENSOR register mb.addHreg(SENSOR_REG); ts = millis(); } void loop() { mb.task(); // Call once inside loop() - all magic here //Read each second if (millis() > ts + 1000) { ts = millis(); mb.Hreg(SENSOR_REG, analogRead(sensorPin)); } } |
Voorbeeld met MGSMODBUS bibliotheek
Wat heb je nodig?
– mgsmodbus bibliotheek
|
1 2 3 4 5 6 7 8 9 10 11 12 13 14 15 16 17 18 19 20 21 22 23 24 25 |
#include <SPI.h> #include <Ethernet.h> #include "MgsModbus.h" MgsModbus Mb; int analogPin = A0; // Ethernet settings (depending on MAC and Local network) byte mac[] = {0x90, 0xA2, 0xDA, 0x0E, 0x94, 0xB5 }; IPAddress ip(192, 168, 2, 28); void setup() { Ethernet.begin(mac, ip); // start ethernet interface } void loop() { //Mb.MbmRun(); Mb.MbsRun(); // Fill MbData //Mb.SetBit(0,false); Mb.MbData[0] = 11; // Getal 11 in register 0 Mb.MbData[1] = analogRead(analogPin); // Analoge ingang in register 1 delay(200); } |
Voorbeeld met MUDBUS bibliotheek
Wat heb je nodig?
– mudbus bibliotheek
|
1 2 3 4 5 6 7 8 9 10 11 12 13 14 15 16 17 18 19 20 21 22 23 24 25 26 |
#include <SPI.h> #include <Ethernet.h> #include "Mudbus.h" Mudbus Mb; //Function codes 1(read coils), 3(read registers), 5(write coil), 6(write register) //signed int Mb.R[0 to 125] and bool Mb.C[0 to 128] MB_N_R MB_N_C //Port 502 (defined in Mudbus.h) MB_PORT int analogPin = A0; // Ethernet settings (depending on MAC and Local network) byte mac[] = {0x90, 0xA2, 0xDA, 0x0E, 0x94, 0xB5 }; IPAddress ip(192, 168, 2, 28); void setup() { Ethernet.begin(mac, ip); // start ethernet interface } void loop() { Mb.Run(); Mb.R[0] = 11; // Getal 11 in register 0 Mb.R[1] = analogRead(analogPin); // Analoge ingang in register 1 delay(200); } |
Algemeen voorbeeld uitlezen met Python op Raspberry Pi
|
1 2 3 4 5 6 7 |
#!/usr/bin/env python from pyModbusTCP.client import ModbusClient client = ModbusClient(host="192.168.2.28", port=502, auto_open=True, auto_close=True, timeout=10) data = client.read_holding_registers(0, 1) # FUNCTIE 03 - Lees register 0 (1 byte lang) print "Waarde register: ", data[0] client.close() |


